
Layout Design Journal Issue #71 (First Quarter 2023):
Magazine Summary
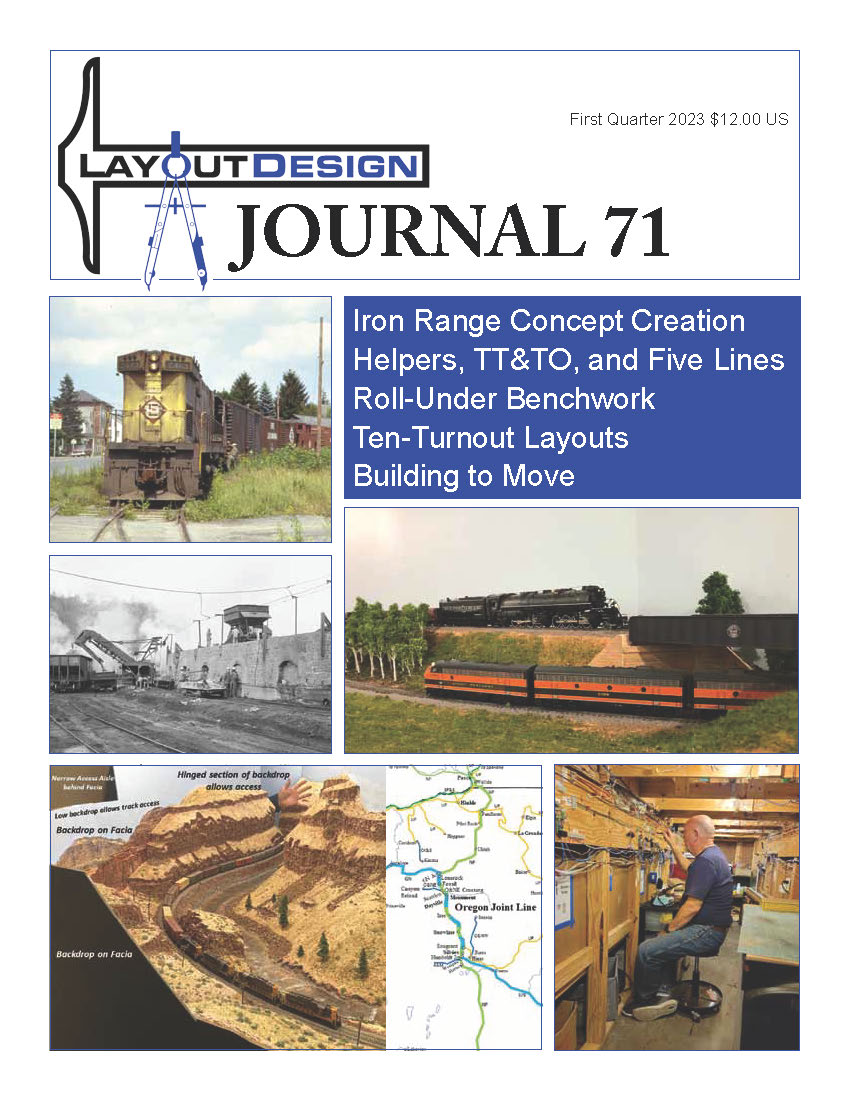
This issue revolves around themes of adaptability, space-conscious planning, historical fidelity, and layout design for relocation or constrained settings. The articles in this edition highlight a growing emphasis on modularity, small-footprint realism, and operational authenticity, while continuing to explore diverse regions and railroad eras.
The feature article by Robert Hanmer examines concept development for a layout inspired by Minnesota’s Iron Range. Drawing from his earlier Hibbing-based plan, Hanmer expands the narrative to include Time Table and Train Order (TT&TO) operations, dual railroad staging, and era-specific freight and passenger traffic, culminating in a nuanced vision rooted in real-world geography and historical traffic flows.
Dean Ferris’s Oregon Joint Line in N scale demonstrates sophisticated proto-freelancing, blending imagined traffic routing and real-world inspirations. Emphasizing trackage rights, helper operations, and yard-to-yard transfers, Ferris effectively models intense operations across multiple railroads while incorporating staging, creative terrain modeling, and complex scheduling.
Jerry Hoverson presents an innovative benchwork solution with “roll-under” access, allowing a raised floor HO layout to remain maintainable even with physical limitations. His thoughtful construction techniques blend accessibility, strength, and visual neatness while maintaining a professional appearance.
The issue also features several 10-turnout layout Challenge designs, each emphasizing operational realism within a small footprint. Richard Turton’s Appalachian-themed design balances coal, coke and glass industry switching with dual-railroad interchange. Robert Stafford’s Pen Argyl branch showcases a standalone adaptation of a larger layout concept.
Eric Hansmann explores strategies for designing layouts intended to be relocated, while Robert Perry discusses single vs. double-track design tradeoffs.
Table of Contents
Articles
Iron Range Concept Development – Robert Hanmer – Page 4
Helpers, TT&TO, and Five Railroads – Dean Ferris – Page 8
Roll-Under Benchwork – Jerry Hoverson – Page 16
Appalachian Town in Ten Turnouts – Richard Turton – Page 21
Ten-Turnout Branch Terminus – Robert Stafford – Page 24
Building to Move – Eric Hansmann – Page 27
One or Two Tracks (or Both?) – Robert Perry – Page 32
Fascia Color Ideas from Display Layouts – Nicholas Kalis – Page 36
Columns / Departments
Ever Had One of Those … Years? – Byron Henderson – Page 3
Changes and Opportunities – Ron Burkhardt – Page 3
Meetings: NMRA DFW 2023 – Page 7
LDSIG Web Volunteers Needed – Page 15
Free Future Issues for Your Articles! – Page 37
Election, Report, and Call for Candidates – Pages 38–39
Detailed Article Summaries
LDJ-71
Title: Iron Range Concept Development: Mines, Two Railroads, and TT&TO on the GN Mesabi Division Page 4
Author: Robert Hanmer
Railroads Modeled: Great Northern (GN); Duluth, Messabi & Iron Range (DM&IR) (Mesabi Division); concept applicable to all RR layouts
Location: Hibbing, Minnesota (previous layout); Gunn, MN; Grand Rapids, MN; Minnesota Iron Range
Era: 1958
Layout Scale: HO
Layout Size: Large room-sized layout
Techniques: Development of a concept; locale and era considerations; Prototype based design; Dual railroad operation, staging, TT&TO, mine runs, freight switching; passenger traffic, historical era modeling,
Summary:
Robert Hanmer describes the evolution of concept for his new Iron Range-themed layout based on shared trackage and operational complexity in northern Minnesota. Building upon a prior Hibbing, MN layout, the new design incorporates timetable and train order (TT&TO) operations, extensive mining operations, and multiple yards. It focuses on a 1958 operational era, chosen to capture a transitional time for steam, diesel, passenger, and ore traffic. Strategic use of GN and DM&IR shared trackage, freight and passenger variety, and industrial modeling creates an operationally rich and historically grounded layout concept.
Title: Helpers, TT&TO, and Five Railroads; Modeling Oregon’s “dry side” on the Oregon Joint Line Page 8
Author: Dean Ferris
Railroad Modeled: Proto-freelanced “Oregon Joint Line” (NP, GN, UP, SP, O&NE)
Location: Eastern Oregon
Era: late ‘60’s / early ‘70’s
Layout Scale: N
Layout Size: 25′ × 28′
Techniques: Multi-deck with no helix; nolix; shared trackage; trackage rights; helper ops; TT&TO; scenic compression; interchange; mid-run terminals; proto freelancing; lumber mills; stacked reversing staging loops; controlling sightlines; designing for photography;
Summary:
Dean Ferris’s Oregon Joint Line blends real and imagined railroads to create a prototypically plausible and visually spectacular layout. With intense mainline operations, helper service, and joint trackage among five competing railroads, the layout prioritizes yard operations, motive power variety, interchange transfers, and dispatcher complexity. The plan features mid-layout terminals, canyon scenes, a hinged backdrop for access, peninsulas eliminating a helix, and creative use of “blobs” to enhance realism in photography and train visibility. A strong focus on interaction and operator challenge—mirroring prototype railroad dynamics—makes this layout an operational standout in N scale, making use of its ability to provide wide open spaces.
LDJ-71
Title: Roll-Under Benchwork: “People tunnels” ease wiring and maintenance Page 16
Author: Jerry Hoverson
Railroad Modeled: Rocky Mountain Central; (based on DRG&W); Colorado Pacific (based on RGS);
Location: Colorado
Era: Any
Layout Scale: HO (standard and narrow gauge)
Layout Size: Garage size 26 x 24’ with staging beneath main level
Techniques: Elevated aisles, roll-under access, JMRI staging control, hard-surface skirts, modular framing, ergonomic access; elephant style loop staging; wye staging; ceiling hung valence
Summary:
Jerry Hoverson introduces a novel benchwork concept to enable seated roll-under access for simplified maintenance and wiring. Designed to accommodate physical needs post-surgery, the 10’ ceiling accommodates benchwork features raised aisles and elevated mainline heights, providing exceptional under layout accessibility, lighting storage, and clean aesthetics. He describes construction of Valances, vertical wall supports, lift out access doors, and integrated power outlets, which enhance function and form. The layout supports complex dual-gauge operations, scenic visibility, and professional-grade construction within a manageable maintenance framework.
LDJ-71
Title: Appalachian Town in Ten Turnouts: Two railroads serving natural-resource industries Page 21
Series: 10 Turnout Challenge introduced in LDJ-69
Author: Richard Turton
Railroad Modeled: Freelanced Appalachian town with B&O and WM elements
Location: Appalachia
Era: 1974
Layout Scale: HO
Layout Size: 10 x 15; reconfigurable U-shape
Techniques: Dual-railroad operations, raw material processing industry modeling, glass manufacturing; interchange, staging via cassettes, compact ops
Summary:
Richard Turton’s layout design challenge explores how to integrate multiple resource-processing industries and two railroads within a 10-turnout constraint. Set in the fictional Appalachian town of “Glassko,” the design supports coal, coke oven, sand, and glass operations with staged cassettes and realistic switching. Live Interchange between railroads and selective view blocks enhance visual appeal. The design offers compelling operations in a footprint suitable for small spaces, emphasizing realism without over-complexity.
LDJ-71
Title: Ten-Turnout Branch Terminus: Portion of a larger design refined as a standalone layout Page 24
Series: 10 Turnout Challenge introduced in LDJ-69
Author: Robert Stafford
Railroads Modeled: Bangor & Portland; (DL&W); Freelanced based on Pen Argyl, PA
Location: Pen Argyl; eastern Pennsylvania
Era: 1974
Layout Scale: HO
Layout Size: 2′ × 9’6″ plus staging
Techniques: Slate industry, selective compression, closet layout, prototype-inspired end of branch line operations
Summary:
Robert Stafford presents a compact 10-turnout layout based on Pen Argyl, Pennsylvania, known for slate quarry operations. Though not an exact replica, the layout retains key commodities, switching complexity, and small-branch operations. Designed to fit in a closet, the plan supports interesting loads such as slate scrap, finished products, feed, and team-track deliveries. It illustrates how a portion of a larger layout can stand alone with engaging operations.
LDJ-71
Title: Building to Move; Sectional benchwork to ease transport, preserve modeling Page 27
Author: Eric Hansmann
Railroads Modeled: Baltimore & Ohio; Varies (generalized advice)
Location: Wheeling, WV
Era: 1926
Layout Scale: HO
Layout Size: 10 x 16; adaptable to space; 2×4’ sections; Modular/portable
Techniques: Modular construction, relocation planning, detachment systems, lightweight scenery, simplicity of design and construction; sectional construction
Summary:
Eric Hansmann shares lessons from building a layout designed to be moved. The article covers track planning from ICC Valuation Maps, sectional benchwork, joinery techniques, detachable electrical connections, scenery strategies, and transport considerations. It’s a practical guide for those anticipating a future move, offering insight into preserving work without sacrificing quality or realism.
LDJ-71
Title: One or Two Tracks (or Both?): Considering layout purpose, operating style, and more Page 32
Author: Robert Perry, O.D.
Railroad Modeled: Freelance Glacier Line (referenced example), general advice
Location: Any
Era: Any
Layout Scale: O (example); general theory
Layout Size: generally applicable
Techniques: Single vs. double-track theory; prototype-inspired design; operations-first vs display running planning; participation-focused layout design; train density; Concept/Theme development
Summary:
Robert Perry addresses a foundational layout design question: whether to model a single-track or double-track mainline. Drawing from both personal experience and prototype principles, he discusses the operational implications of each option. Perry advocates for an “operations-first” mindset—selecting mainline configuration based on desired operator participation and engagement, traffic patterns, and terrain constraints. He stresses the importance of meaningful interaction between trains and operators, whether through dispatcher communication, meets, bottlenecks, or maintenance-of-way (MOW) scenarios. The article incorporates design examples from the Glacier Line O-scale layout and emphasizes hybrid designs that strategically mix single and double-track sections to increase interest and realism. Perry’s commentary is especially valuable for designers weighing aesthetics against complexity and operational depth.
LDJ-71
Title: Fascia Color Ideas from Display Layouts
Author: Nicholas Kalis
Railroad Modeled: Ian Clark’s Rockingham (UK P4 layout)
Layout Scale: P4 (4mm:1ft, similar to OO)
Layout Size: Exhibition display layout
Techniques: Visual design, fascia integration, exhibition modeling, color harmony
Summary:
Nicholas Kalis critiques common fascia color choices in American model railroads and offers insights from British exhibition layouts, particularly Ian Clark’s P4 Rockingham. He argues that U.S. layouts often default to green or black fascia colors that clash with the modeled scenery or remain unpainted, detracting from visual appeal. In contrast, the British layout features a putty-colored fascia that harmonizes with the scenery and enhances the viewing experience. Kalis encourages modelers to consider fascia color as part of the overall presentation, not an afterthought He offers aesthetic advice backed by photographic examples and suggests using muted or complementary tones based on the layout’s theme. The article closes by pointing readers to further resources in the LDSIG Layout Design Primer.
Download a free sample of pages from this issue.
To download the issue login to your member account: click “here“.
Non-members can join or renew: Click “here“
JOURNAL 71
First Quarter 2023 $12.00 US
Iron Range Concept Creation
Helpers, TT&TO, and Five Lines
Roll-Under Benchwork
Ten-Turnout Layouts
Building to Move
The Layout Design Special Interest
Group (LDSIG) is an independent, IRS
501(c)(3) tax-exempt group affiliated
with the National Model Railroad Association
(NMRA).
The LDSIG’s goal is to act as a forum for
the members’ exchange of information
and ideas, and to develop improved ways
for hobbyists to learn the art and science
of model railroad layout design.
Visit the LDSIG on the web:
www.ldsig.org
- Conventions – LDSIG events at NMRA
National Conventions. - #author::George
- Layout design tips and rules-of-thumb
- LDSIG organizational news
Webmaster needed, see page 15
LDSIG Discussion Forums:
https://groups.io/g/ldsig
https://tinyurl.com/LDSIG-FB-Group - Layout design ideas exchange
- Peer-to-peer help with track planning
“Like” the LDSIG on Facebook:
www.facebook.com/Layout.Design.SIG - Local and regional event notices
- Announcements and Q&A
Chris Mesa, Social Media Coordinator
cmesa57@gmail.com
LDSIG Board of Directors
Journal Ron Burkhardt, President (2021-2023)
32209 Bretton St.
Livonia, MI 48152
tel: (765) 427-4667
rjb6893@gmail.com
Doug Harding, Vice President (2021-
2023)
1400 Country Club Rd.
Indianola, IA 50125
tel: (319) 288-1126
doug.harding@iowacentralrr.org
K. Travers Stavac, Treasurer (2022-
2024)
513 Heavitree Ln.
Severna Park, MD 21146
tel: (410) 987-4848
sailsman@att.net
Cal Sexsmith, Secretary (2020-2022)
Box 29 Site 601 RR 6
Saskatoon, SK S7K 3J9
tel: (306) 281-7812
calvinsexsmith@sasktel.net
Chris Mesa (2022-24)
2514 E Timbercreek Ct.
Eagle, ID 83616
(208) 870-3632
cmesa57@gmail.com
Doug Gurin, Director Emeritus and
LDSIG Founder
605 Tennessee Ave.
Alexandria, VA 22305
tel: (703) 549-0925
dbgurin@gmail.com
The Layout Design Journal (LDJ) is the
official publication of the Layout Design
Special Interest Group, Inc.
Byron Henderson, Editor
1451 Montelegre Dr. (new street address)
San Jose, CA 95120
ldjeditor@gmail.com
Volunteer Associate Editor position(s)
open, please contact Byron
Assisting with this issue of the LDJ:
Copy Editing: Frank Dekker, Ron
Newby, Don Winn, Dick Zeren
LDJ Submissions
We welcome your contributions to the
LDJ. Please contact the editor (above)
with ideas for content before sending
original materials. When sending hardcopy,
please include a SASE if you would
like the materials returned.
LDJ Working Group
Join the volunteer team working on the
LDJ. We always need help with graphics
creation and editing, story editing, and
copy editing. Contact the editor (above).
Opinions
The opinions expressed in the LDJ are
solely those of the original authors where
they are not otherwise credited. The
NMRA, the LDJ Editor, or the LDSIG
Board of Directors does not necessarily
endorse them, unless so noted.
Reprinting
Permission is granted to the NMRA or
other related non-profit organizations to
reprint material from this publication, provided
proper author credit and contact information
for LDSIG membership is given.
For all other organizations, permission
to reprint material from this publication
must be obtained before it can be used.
Back Issues
Back issues of the Layout Design Journal
are available for purchase. A current back
issue list is available online at:
www.ldsig.org/publications
Moving? Contact LDSIG Member Services (above) with your new address. Don’t miss an issue!
LDSIG Membership
For print delivery of LDJ
Dues: US $40.00; Canada $55.00; International $70.00 (all USD) On-line LDJ download Dues: $16.00 USD - One membership cycle includes four
issues of the Layout Design Journal.
Please make checks payable to the
“Layout Design SIG.” Canadian and
Foreign payments must be drawn on a
US bank, paid using PayPal, or be via
an international money order. No foreign
checks, please. Contact Member Services
(below) to join or renew, or visit:
www.ldsig.net/membership
LDSIG Member Services
New memberships, renewals, and change
of address:
John Young
577 N Searls Rd.
Webberville, MI 48892
membership@ldsig.org
LDSIG Convention Activities
Bruce Morden
bdmorden@sbceo.org
Local volunteers needed for NMRA
DFW 2023; Long Beach, CA 2024
LDSIG Bylaws
LDSIG Bylaws are available online at
www.ldsig.org or may be requested by
sending a SASE to the LDSIG Secretary.
Support the SIG! - Donations are always welcome and may
be deductible for tax purposes. - LDSIG members are welcome to become
candidates for Board of Directors
positions annually. Contact any Board
Member above for more information. - Members are encouraged to organize
casual or formal SIG meetings in their
area. Contact Byron Henderson (above
right) for information and suggestions.
LDJ-71 First Quarter 2023 3
Ever had one of those … years?
by Byron Henderson, LDJ Editor
Features
Iron Range Concept Development ………………………4
by Robert Hanmer
Helpers, TT&TO, and Five Railroads …………………..8
by Dean Ferris
Roll-Under Benchwork …………………………………….16
by Jerry Hoverson
Appalachian Town in Ten Turnouts …………………….21
by Richard Turton
Ten-Turnout Branch Terminus …………………………..24
by Robert Stafford
Building to Move ……………………………………………..27
by Eric Hansmann
One or Two Tracks (or Both?) …………………………..32
by Robert Perry, O.D.
Fascia Color Ideas from Display Layouts ……………36
by Nicholas Kalis
News and Departments
Ever had one of those … years? …………………………3
by Byron Henderson, LDJ Editor
Changes and Opportunities ………………………………..3
by Ron Burkhardt, LDSIG President
Meetings: Dallas/Fort Worth NMRA; Aug. 2023 ………7
LDSIG Web Volunteers Needed ………………………..15
Free Future Issues for Your Articles! ………………….37
Election, Report, and Call for Candidates …….. 38-39
Greetings from what seems to be light years ago. Hope
all members and their families are well and that your individual
hobby pursuits are on track. Seeing this issue of the
LDJ assures me the LDSIG is doing well (and membership
is growing).
Please vote and contribute
There are many changes in the hobby; everything from
Zoom meetings to new leadership. You’ll see election info
in this issue (pages 38-39) so that you have opportunities to
support our BoD and activities. Please vote, and consider
how you might contribute to our leadership and activities in
the future, as well (See the call for candidates page 38 and
see page 37 to learn about the opportunity to extend your
membership for free by submitting LDJ articles).
Meetings – live and virtual
I’m pleased to report that the LDSIG was well represented
at both the Indianapolis and St. Louis gatherings as
well as other public facets of our hobby calendar. We’ve had
our Annual General Meeting and several seminars via Zoom,
hybrid in-person/remote Bay Area SIG Meets in 2022 and
2023, and we anticipate more such activities.
What topics would you like to explore (or maybe you’d
like to present?!?). Contact any of our BoD members with
your ideas; Chris Mesa will get back to you with the how-to.
And we have lots of activities planned for the Texas Express
NMRA National Convention in Dallas/Fort Worth later in
2023 (page 7).
Moving forward
Changes are inevitable, even in a tight-knit group like
ours. For example, I’ve moved and that means another
“Lifetime Layout” design and construction (only #8 so far).
Keep us abreast of your layout progress or challenges; we
all learn in the process. The gregarious nature of our hobby
leads to many friendships, and unfortunately, some losses.
I’ll cite only the passing of W. Allen McClelland – a kinder
and more helpful leader in our hobby we may never find.
Thank you, Sir!
Changes and Opportunities
by Ron Burkhardt, LDSIG President
Moving? Don’t miss an issue. Contact
Membership Chair John Young:
577 N Searls Rd.; Webberville, MI 48892
Or email: membership@ldsig.org
(continued on page 39)
I would never have imagined that it would be so long
between LDJ issues, and I apologize to the membership. My
immediate and extended family has gone through illnesses,
surgeries, and more since LDJ-70. Not to mention a household
move after 25 years at the former LDJ Intergalactic
Headquarters. The LDSIG Board and many members have
been extremely supportive, with particular thanks to Travers
Stavac.
OK, that was then, this is now. I hope that you enjoy this
issue. We have more articles that are a little shorter than usual,
but there’s lots to learn from each one. Don Winn, who is
the LDSIG Local Coordinator for the Texas Express NMRA
Convention in the Dallas/Fort Worth area (Aug. 20‑26,
2023), helped develop articles by authors whose layouts will
be on the Wednesday LDSIG Tour. Two in this issue (pages
8 and 16) and two more for LDJ-72, which should be distributed
by June. See page 7 for more on the Convention.
LDJ
4 Layout Design Journal www.ldsig.org
Iron Range Concept Development
Mines, Two Railroads, and TT&TO on the GN Mesabi Div.
Story and images by Robert Hanmer
Twenty-two years ago, my wife and I decided
to add-on to our house. She’d get the
studio space she needed to pursue her craft
and I’d get a railroad space. The exciting question
for me was what to model.
Hibbing home for previous layout
My previous railroad was a model of one
town, Hibbing, Minnesota. I described this
railroad in Model Railroad Planning 2011.
Hibbing was a busy place with a double-track
mainline through town that was used by two
railroads, the Great Northern (GN) and the
Duluth, Missabe & Iron Range (DM&IR).
Hibbing is the home of the world’s largest
open-pit iron ore mine, and both railroads
served mining companies working the pit in
my modeled year on that layout of 1961. This
railroad was built in a 10’ X 11’ bedroom and
designed for three operators. Eventually I managed
to employ a crew of ten working on
the railroad by rotating assignments and
creating clerking jobs that stayed out of
the train room.
Desires for the new space
When deciding what to model for
the new railroad I had a good start on
a few key givens & druthers. It had to
feature both the GN and the DM&IR
(see sidebar, page 5). It had to have
mines and mine-run trains. It needed at
least one yard and ideally at least one
location with heavy freight switching.
It needed to be Timetable-and-Train-
Order (TT&TO) controlled, something
Hibbing lacked. But I wanted someplace
like Hibbing, where both railroads had
to cooperate and share trackage, as seen
on the schematic of the previous railroad
(page 5, top right).
Some passenger traffic?
Another desirable feature was the
existence of passenger trains. They
didn’t need to be fancy, but both my parents
had stories about GN branch line
passenger trains which appealed to me.
I wanted to choose sometime in the
1958-1961 era to enable both Missabe
diesels and steam to operate.
I started looking at a map for a suitable
location (page 5, middle right).
Missabe passenger trains ended in
1961 – but there was a single Rail Diesel
Car (RDC) at the end of service. Their
lone RDC-3 overnighted in Hibbing,
where it began and ended operating ses-
(Above) Loaded and empty ore trains meet in Hibbing on Robert’s previous
layout. The overhead track represent a DM&IR yard that on the model both
railroads use.
The earlier 10’X11’ foot room layout is seen below. Despite the compact
size, the layout was able to support a crew of ten – with some working outside
the train room itself. The shared elevated DM&IR yard is at back left.
LDJ-71 First Quarter 2023 5
Joint Trackage: Operating Interest and Scenes
Expansion of iron mines created the need for the railroads to hop
back and forth between different trackage rights. The DM&IR mainline
originally circled north
of the town of Calumet. But
the mines there expanded,
severing the Missabe line.
So the Missabe established
trackage rights on the GN.
Between Marble and Bovey
both railroads had big
bridges spanning a creek.
The GN’s was wooden, the
Missabe’s steel. The GN
abandoned their bridge and
established trackage rights
on the DM&IR. – RH
sions on my previous railroad. The GN had no
passenger service to Hibbing. (Trivia to impress
your friends: the Greyhound Bus Lines
began in Hibbing.) Any yards for an expanded
Hibbing would be strictly ore yards which
don’t provide the kind of freight yard switching
I wanted to model.
GN passenger trains mean a mainline
In order to get GN passenger trains I’d
have to be on a mainline somewhere. Few GN
mainlines in Minnesota intersect on the iron
ore deposit. But the line from Duluth/Superior
to Grand Forks, ND still had passenger trains
until 1959. Almost every photograph of this
line has an EMD NW-3 diesel, a baggage car,
and a coach – which would be fun to model. If
I modeled this, I could add a few more express
cars to recreate a mini-Fast Mail.
This mainline also provided the ability for
overhead freight trains including Great Lakesbound
grain and Dakota-bound empty “box
extras.” The Duluth/Superior to Grand Forks
line doesn’t have many towns requiring local
switching, but there are a few.
Missing the Missabe
But how to connect the Missabe
(DM&IR)? Hibbing is not on this mainline.
The line serving the Mesabi Iron Range diverges
from this GN mainline, so the Missabe
territory east of Hibbing is even farther away
from the GN than Hibbing.
Duluth/Superior was a possibility, but that
is mostly yards. There are none of my desired
iron mines in Duluth/Superior, though there
are ore docks. But I’m from the Iron Range
and it’s fair to say there’s a little animosity
between the “north end” of the railroads and
the “Twin Ports.” Also, I live not too far from
Dan Holbrook’s fabulous rendition of Duluth/
Superior that I can’t hope to duplicate.
Have Gunn, will connect
West of Hibbing the Iron Range main and
the Grand Forks (3rd subdivision) main converge
at a place called Gunn. From Gunn the
10th subdivision of the GN heads northeast
along the Iron Range, allowing the mines to
be served.
The westernmost extension of the DM&IR
just happens to be about six miles up the 10th
subdivision from Gunn. From that convergence
east for about five miles the two rail-
Grand Forks, ND
Bovey
Grand Rapids
Calumet
Pengilly
Kelly Lake
Superior, WI
Gunn
Proctor
Yards
Great Northern
DM&IR
To DM&IR
Rust Yard
To DM&IR
Mitchell Yard
To Proctor
via Mainline
To Mines To Mines
To Proctor via
Hull Rust Shortline
To GN Kelly Lake
Yard and Superior To GN Chisholm
DM&IR Freight Sta.
GN Passenger and
Freight Stations
Double Track
Robert’s earlier 10X11 HO layout focused on Hibbing. Minn. (schematic
above), which featured an area where the Great Northern and
DM&IR shared the double-track mainline.
Robert’s Hibbing layout provided plenty of operations for up to ten
people, but it lacked a few desired elements, especially TT&TO traffic
control – which Hibbing did not have in real life. So the search was on
for a spot with similar interaction, but also TT&TO, mine traffic from
the Mesabi Iron Range, etc. The schematic above included some possible
locations for modeling in the new larger space.
GN shared the DM&IR’s Holman
Bridge via trackage rights, a striking
scene on Robert’s layout.
6 Layout Design Journal www.ldsig.org
roads shared trackage. Sometimes it was GN
trackage; sometimes DM&IR trackage.
A great mix
I had found the territory I wanted to model
(map at left). Modeling the western end of the
GN’s 10th subdivision and the part of the 3rd
subdivision that connects with it affords me: - Two railroads sharing trackage.
- A DM&IR yard (“High Grade Yard” in
Bovey) originating mine runs out to various
US Steel mines. - A GN junction yard (Gunn) that could
handle general freight for the locals and
local industry. - Several GN-served mines
- A GN mainline with passenger and overhead
freight traffic. - Just west of Gunn is Grand Rapids, home to
a large paper mill, which provides extensive
local switching. - Separate mainlines for both railroads.
- Opportunities for many mines still working
in the late ‘50s.
Selecting a “just-right” era
Along with the ideal locale, I chose an era
that supports my layout concept and operating
desires. I wanted to fit into the 1958-1961
timeframe for a number of factors. I settled on
1958 as the perfect year for these reasons: - DM&IR was receiving its third order of
SD-9s, so I could model the locomotives I
saw growing up. - DM&IR still used its big steam (2-10-2,
2-10-4, 2-8-8-4). - GN was fully dieselized – meaning I don’t
need to buy any GN brass steamers. - There was a Steelworker’s strike (Iron miners
are in the United Steelworker’s Union)
from July 15 to November 7, 1959 which
would put a serious damper on operations. - The steel companies and the railroads knew
in advance that this strike was likely to
happen in 1959, resulting in a heavy 1958
shipping season as they built stockpiles to
weather the strike. - The 3rd, 10th and unmodeled 9th subdivisions
received CTC in 1959, which removed
the TT&TO. - The passenger trains to Grand Forks ceased
in 1959. - The Missabe had fewer diesels in 1957 and
ore traffic levels weren’t as high as 1958.
Grand Rapids
Bovey (DM&IR Yard)
Gunn
(Left) The Mesabi (Iron)
Range seen at the midupper
right on the map is
the key locale of mines
generating traffic for
Robert’s layout concept.
Gunn was a key junction
point in this area of GN/
DM&IR cooperation. Map
from the National Atlas
of the United States, a
federal project in the
public domain in the US.
One of Robert’s reasons for choosing 1958 is that massive steam
engines like this DM&IR “Yellowstone” were still in regular use, seen
below again on Holman Bridge. But Diesels were already making
inroads, even on the DM&IR, so the entire fleet need not be brass.
227 was retired in 1960 and now is preserved at the Lake Superior
Railroad Museum in Duluth, Minn.
LDJ-71 First Quarter 2023 7
Satisfying choices
I built the railroad, fitting most of what
I wanted into the space. Operations started
on a modeled date of May 1, 1958 and
have progressed to August 3, 1958 through
nearly 250 operating sessions. Crew size
ranges from 8-12 people, depending upon
their experience, to recreate heavy iron ore
operations on the Mesabi Division. I’m
very happy with the railroad as it has been
built.
(Below) Robert’s operating sessions
move through the 1958 calendar, reflecting
seasonality. The below image of
two ore extras graces the August 1958
calendar page prepared for his crews.
Tips …
- Industry and junction yards can be excellent modeling subjects, providing
desired operations without requiring the space of a division-point yard. - Trackage-rights operation can combine railroads with distinct characteristics
in motive power, commodities carried, etc. at a point in time. - Choosing the right prototypical era may include considering desired rolling
stock, traffic levels, even external events like labor actions.
… and Trade-offs - Friends’ modeling subjects may influence our own choices to avoid duplication
and repetition. - Past favorite modeling concepts and locales may not meet current interests
(e.g., passenger trains), requiring searching farther afield for prototype
settings. - Branches and secondary lines are often of a modelgenic scope, but mainlines
may be necessary to provide desired types and qualities of traffic on a
prototype. – BH
Upcoming Design and Ops Meetings
Join the fun and learning by attending one of these upcoming events – or organize one in your area
NMRA Dallas/Fort Worth– Aug. 20-26, 2023
We’re planning a full slate of activities at the Texas
Express 2023 Convention (www.2023texasexpress.com)
in the DFW area, including the Sunday Meet-and-Greet,
free layout help sessions, and much more. And, of course,
the terrific Wednesday LDSIG self-drive Layout Tour. Bring
your mock-up or poster to exhbit in the SIG Room. Local
Coordinator is Don Winn; email donswinn@gmail.com
See some of the Texas Express layouts in this LDJ (pg. 4,
16), future issues, and on the LDSIG’s web page
www.ldsig.org
Your event here!
Regional LDSIG get-togethers can be as simple as a casual
gathering in a living room or layout crew lounge. They are a
terrific way to meet and exchange ideas with other LDSIG
members and interested modelers near you. Contact Byron
Henderson (page 2) for useful information, member mailing
lists, and tips on how to set up a meeting of your own. We’ll
also publicize your event in the LDJ and on the Internet.
LDJ
8 Layout Design Journal www.ldsig.org
Helpers, TT&TO, and Five Railroads
Modeling Oregon’s “dry side” on the Oregon Joint Line
Story and images by Dean Ferris
The western United States is full of railroads
sharing routes and trackage, making
for some of the most interesting railroad operations
in the country: Tehachapi Pass (SPATSF),
Cajon Pass (UP-ATSF), the Colorado
Joint Line (DRGW-C&S-ATSF), Seattle-Portland
(NP-GN-UP-MILW-SP&S over various
portions), the northern Nevada Paired Track
WP-SP, and many others. Railroad development
came later to the west – after the era
when every railroad felt the need to have their
own lines to everywhere.
In some cases it made sense to share the
costs of a single line to extend the network
reach of the participating railroads. The rugged
topography of the west also made it impractical
in other cases to replicate routes
through strategic geographical choke points
(like Tehachapi Pass).
Often the shared tracks were required by
government edicts, in other instances railroads
were willing participants in these arrangements.
These shared tracks take various forms,
but most typically the constructing/owning
railroad hosts another railroad via “trackage
rights” through which the tenant pays fees to
the owner to cover their share of the maintenance
and operations (such as dispatching)
costs of the line.
Prototype joint line inspirations
My 25’ X 28’ N-scale Oregon Joint Line
was primarily inspired by two such joint arrangements
in central Oregon. The Oregon
Trunk was a shared Spokane, Portland, &
Seattle (SP&S) and Union Pacific (UP) line
between the Columbia River and Bend, Oregon
largely following the basalt rock lined
canyon of the Deschutes River. Farther south
the Southern Pacific (SP) and Great Northern
(GN) mainlines funneled together at Chemult,
Oregon for the 70-mile run to Klamath
Falls, the southern Oregon terminals for both
railroads. This busy single-track line carried
(and still does) the vast majority of Pacific
Northwest (PNW) to California tonnage in
the western US.
Proto-freelancing for the “home road”
I would have modeled the Oregon Trunk
itself, but I grew up along a Northern
Pacific branchline and it’s always been
my home road – whereas the Trunk was
more of a route for GN through traffic
(GN owned the line south of Bend to the
Western Pacific connection at Bieber).
I surveyed a plausible NP route
from their eastern Washington terminal
at Pasco down through central Oregon
meeting up with Southern Pacific and
Western Pacific mainlines in northern
Nevada (map at left). This provided a
reasonably competitive route between
the PNW and California. But I still liked
the GN so I got a little crazy and laid out
a diagonal route through eastern Oregon
towards Salt Lake City. I imagine that
both railroads found that the mountain
pass at the headwaters of the south fork
of the John Day River would provide the
best route through the territory, so they
joined forces on a single line known as
the Oregon Joint Line (OJL).
Dean’s proto-freelanced route map incorporates some real-life segments of
railroads in eastern Oregon while also adding imagined junctions to bring
in desired railroads, operations, and connections. The Great Northern (bold
blue) and Northern Pacific (bold green) share trackage rights on much of
the line.
LDJ-71 First Quarter 2023 9
Joint-line benefits
There are several advantages to modeling
a joint line. Increased variety of motive power
and equipment is an obvious one, especially
when the railroads sharing the line have subsequently
entered into the power pooling arrangements
with other railroads. These began
to proliferate in the late ‘60s/early ‘70s era I
model.
Yard operations frequently make for the
choke-point limiting layout capacity – but
with a joint line the yard operations of both
railroads can be modeled, allowing for much
higher traffic density on the mainline without
melting-down the session. And these yard operations
of side by side or daisy-chained (such
as on the OJL) yards can then offer up one
of my favorite aspects of railroad operations
(both in the model and prototype world going
back to my yardmaster days) – interchange
transfer runs. These transfer runs (if replicated
correctly) require close, but often contentious,
coordination between the yardmasters of the
competing railroads.
Operating roles – and attitudes!
These scenarios still play out every day in
cities with two or more yards (even on yards
of the same railroad!) – “I won’t take your
cars until you take mine”; “You said you were
bringing me 20 cars but you showed up with
35”; “You said you were ready for me to deliver
but your switch engine had me blocked for
an hour”; “I cleared my lead for you to come
in but it took you an hour to get here”; etc.
Sometimes things can get heated, even
in the model world, but on the OJL it typically
means a lot of good natured ribbing and
“sticking it” to your fellow yardmasters which
ultimately leads to lots of laughter. It’s funny
how I don’t really have to coach my operators
on ways to achieve this prototypical behavior,
it seems to come naturally to them.
More traffic, more interactions, more
engagement
I like to move a fair amount of traffic in
sessions. I like to see a lot of meets, I like for
trains to stop and work in yards along the way,
and I like helper operations. Above all, I encourage
interaction – this isn’t the layout to go
hide in a corner and be left alone switching industries.
A typical through freight crew moving
across the line will talk to the dispatcher
several times, they’ll talk to at least two yardmasters,
they’ll work together with a helper
crew to get the train over the hill, and they’ll
likely meet 2-3 trains along the way.
And I like to keep my regular operators,
many of whom are professional railroaders, on
their toes by challenging them with one-time
scenarios. Many of these scenarios are events
I experienced while working as yardmaster or
trainmaster on the prototype – such as a derailment
up the line yesterday meaning that the
yardmasters will be dealing with two-day’sworth
of traffic arriving in the yards today;
or there’s a train which died on its hours of
service at the first siding north of the yard that
On Tour at DFW 2023 Convention
Dean Ferris’s Oregon Joint
Line is just one of the layouts
LDSIG members can visit on
the Wednesday self-guided
tour at the NMRA 2023 Texas
Express Convention in the
Dallas/Fort Worth area August
20-26 (along with Jerry
Hoverson’s layout [page 16]).
We’ll publish more stories on
Convention layouts in the next
LDJ. See page 7 of this issue
for more information; and look
for future detailed Convention
information coming soon on
the LDSIG’s website.
A southbound Northern Pacific train winds its way through the doublesided
basalt canyon of Picture Gorge. The only reasonable operator
viewpoint for Picture Gorge is at the head of the canyon, so with N
scale’s small size and a viewing distance of at least three feet there
was no need to model wire on the slide fences which contribute so
much to the credible look of the scene. – DF
“… keep my
operators, many
of whom are
professional
railroaders, on their
toes by challenging
them …”
10 Layout Design Journal www.ldsig.org
must be “dog-caught”* by the switch crew before
they can began their regular work putting
them behind for the entire session. My regular
operators never know what challenges might
pop up, which keep things fresh. - When a real-life railroad crew exceeds their allowable
hours on the job, they must stop wherever
they are. A “dog catch” crew is driven out to operate
the train to the closest terminal. – BH
1 sq. ft.
When Dean was able to expand into more space, he eliminated a helix in favor of multiple
peninsulas to provide running room for grades that depict the geographic locale and still provide
headroom for staging beneath the visible layout. The turnback curves (“blobs”) are typical of reallife
railroads battling grades in the modeled area.
Losing a band, “unwinding” a helix
Starting our layout tour (track plan below)
from the north end we come first to GN Junction,
which is where the mainlines of the NP
and GN pop out of staging and combine to
become the Oregon Joint Line. Immediately
adjacent is Lone Rock siding – part of my
“unwound” helix. Originally, I built a helix to
connect the lower staging deck with the main
deck. But when additional mid-room layout
Lone Rock
below
LDJ-71 First Quarter 2023 11
space became available after my rock band
broke up, the helix was “unwound” into a peninsula
which contains what I consider the best
scenery on the layout.
Part of that unwinding included increasing
the grade through Lone Rock so that by
the time you get to the south siding switch
there’s only 7” spacing between decks (photo
top right). Conventional wisdom would tell
you that this is unworkable, but by having the
mainline and passing siding up against the
aisle (no reason to reach back into the scene)
it works just fine. Again, the alternative was to
hide this track deep in a helix so, heck yeah,
that’s a compromise I’d make every time.
Mountain topography to the rescue
The mainline next enters a tunnel and
then pops out in Picture Gorge. There is a bit
of back-tracking around the peninsula in this
area, which experts would tell you is another
big no-no as you can’t follow your train. The
reason it works in my case is that Picture Gorge
is a double-sided canyon and you can’t really
follow your train anyway – you’re forced to
soak up the view from the head of the canyon,
which happens to be the most scenic feature
on the layout (photo lower right).
“Disruption” adds interest
The OJL tracks continue upgrade along the
South Fork of the John Day River (which they
follow for 35 feet) reaching the dispatcherhating
shortest passing siding on the layout at
Fossil. Across the river is the log-loading terminal
of the proto-freelanced Oregon & Northeastern
Railroad (O&NE) at Canyon Reload
(photo page 13). The OJL and O&NE continue
to parallel each other on opposite sides of the
river up to the point that they cross at the automatic
interlocking at O&NE crossing.
The arrangement here is intentionally disruptive
to mainline operations by having the
O&NE’s typical switch lead head-room extend
through the first-come/first-served interlocking.
Scanlon Yard is the O&NE’s major
terminal where pulp and plywood mills consume
the logs brought in from Canyon Reload
and supply a large amount of outbound forest
products for interchange to the GN and NP.
(Too?) big yard
Next up is NP’s “Big Monument” industrial
park, a nod to NP’s “Big Pasco” indus-
Obviously 7-inch spacing between decks is too tight, correct?
By placing the mainline and siding up against the aisle,
and limiting the depth of the scene, this arrangement at the
south end of Lone Rock siding allowed me to joyfully kill my
helix. – DF
Tracks winding through steep double-sided canyons make
for some of the most spectacular sights in railroading, but the
need for access in case of maintenance or derailments makes
this feature tough to model. By placing the far backdrop on the
inside of the fascia with a narrow access aisle behind it, I’m
able to reach every point within the canyon thanks to a hinged
portion of backdrop on the lower end of the canyon where a
creek allows for a break in the canyon walls. – DF
12 Layout Design Journal www.ldsig.org
trial park near their hump yard at Pasco, WA.
Big Mo has a pig ramp and large fruit loading
cold storage which generate lots of high priority
traffic, mostly bound for eastern markets
via Pasco. NP’s Monument Yard is the largest
on layout and its nine tracks provide over 200
cars of capacity.
If I had to do it again I’d make it a bit
shorter, as there’s a fair amount of track at
the north end that doesn’t get used much (the
south lead is where classification typically
takes place). Past Monument’s loco servicing,
car shops, and MOW (Maintenance-of-Way)
compound we reach Great Northern’s 7-track,
120-car capacity Dayville Yard, which serves
as their major terminal on the layout.
Prototype-inspired switching
Immediately in front of Dayville Yard is
NP’s 7th Avenue industrial spur, which is a nod
to my switching days back in Seattle working
the 7th Avenue Job. This twenty-foot-long
spur is all “other than main track” so there’s
no calling the dispatcher for authority – it’s all
stop-before-you-hit-something territory. The
reason I can comfortably place a busy industrial
spur in front of a large yard on the same shelf
is that it’s N-scale – trying to squeeze the same
arrangement into HO would be folly! There’s
The QRG at Snowline. I’ve always loved the way railroads look when viewed from
below when the tracks are carved into a rock shelf on steep slopes – DF
a lot of interaction between the
three yards in this terminal,
which is very loosely based on
SP, GN, and forest-products
shortline Oregon, California, &
Eastern operations at Klamath
Falls, Oregon.
Help to make the grade
We exit the terminal area
southbound past the three-track
7th Ave. industrial-support yard
and begin climbing the 2.2%
incline to Snowline, which is
the steepest grade on the layout.
Nearly all southbounds, other
than passenger and piggyback
trains, will have picked up a
helper loco (typically a single
GP7) after completing their work
at Dayville or Monument.
Many folks would consider
N-scale helper ops a bit risky but
it tends to work pretty well for us
depending on the throttle coordination
between the two operators. Snowline
siding (photo upper left) at the top of the hill is
a frequent meeting point for trains and typically
the spot where helpers will cut out. Heavy
traffic and large operating crews sometimes
dictate the use of two active helper crews on
the layout simultaneously and the dispatcher
will have his hands full dealing with two helper
trains meeting at Snowline.
Adding-in the UP
Over the top of the hill we drift down
the 1.8% grade past the ballast pit at Basalt,
a common destination for work trains (which
run almost every session) on the layout. The
next siding at Emigrant is the location of a
large lumber mill and the connection with
Union Pacific’s Burns Branch. UP has trackage
rights from Emigrant down to NP’s Silvies
Yard where the two roads interchange.
Busy yard, challenging job
Silvies Yard is probably the toughest assignment
on the layout due to all of the activity
and traffic volume it handles within its
cramped footprint. It’s the base for the Emigrant
Local, the interchange point for UP’s
Burns Local, the serving yard for the large
Graystone cement plant, and the Silvies yard
“If I had to do it
again I’d make [the
yard] a bit shorter …”
LDJ-71 First Quarter 2023 13
(Above) Depending on your goals for the layout, “blobs” can sometimes become an
asset. The apex of a blob can make for great vantage points for my favorite style of
“see the entire train” photography which is common in the arid western states. Here
I’m standing (apparently) on top of “Blob Knob” shooting over the top of the horseshoe
curve as the Oregon & Northeastern “Logger” departs Canyon Reload while an NP
southbound climbs the Oregon Joint Line grade across the river. The two trains will
race to get to the first-come/first- served automatic interlocking at O&NE crossing, but
in this case the NP hare will likely beat the Logger tortoise.
(Right) Big spaces in N scale
make for big scenes – such as
Curve 57, which is named for
its 57” radius (the HO equivalent
would be 105”). Even the
longest passenger equipment
looks good on curves this
large. – DF
[Yes, this is N scale! – BH]
14 Layout Design Journal www.ldsig.org
Beyond Silvies is Humboldt Junction
where the GN and NP split and the line to
Westpine begins. The Westpine mill complex
was a late addition to the layout after the dispatcher
was moved out of this area into a newly
constructed office. The Anderson
& Middleton crew begins
the day by bringing in their log
train from the woods (staging),
then switching the log dump and
mill tracks, followed by sorting
out the outbound “commercials”
for interchange to the NP and UP,
and then returning to the woods
with their log empties.
Staging – seen and unseen
NP staging is visible and
scenicked at the north end and
continues under the backdrop
into the staging deck, where it
shares the shelf with GN staging.
There are stacked reversing
loops at both the north- and
south ends of staging which allow
for easy turning of trains
between sessions. There’s also
a two-track continuous-run connection
between the north and
south staging yards – one track
hosts a loaded coal train and the
other an empty – so that opentop
loads and empties are always
going in the right direction.
Blobs aren’t so bad
Scenically the Oregon Joint Line makes
great use of N scale’s ability to provide wideopen
spaces. I know some would take issue
with the three “blobs” on my layout but these
make for some of the best photography vantage
points.
Shooting down the tracks leading up to the
apex of the blobs offers the western style of
“see the entire train” photography that I love
(photo top page 13). And Oregon may well
have the highest density of prototype blobs per
track mile of any state with all of its canyon
and mountain routes!
Busy mid-run yard a worthwhile
compromise
The major terminal containing NP Monument,
GN Dayville, and forest products short-
The Anderson & Middleton “Westpine” operation was a late addition to the layout
after space was made available when a proper dispatcher’s office was constructed
elsewhere. Large lumber mills can easily cover dozens (or even hundreds) of
acres, making them tough to model convincingly, So I was determined to dedicate
enough space to allow for a log deck that looked like it could supply the mill for
days rather than hours. Behind the log deck is the lumber drying shed on the left
with the main mill building on the right. Beyond that are the dry kiln and lumberand
chip loading tracks in the distance. – DF
Tips … - Trackage rights and other joint-track arrangements provide
modelgenic mixes of equipment and operations. - Turnback curves (“blobs”) may be designed to create deep
scenes, control sightlines, and still offer good access (especially
in N scale). - Shallow scenes make tight tier-to-tier clearances less visually
objectionable.
… and Trade-offs - Mid-run major yards may make TT&TO operations challenging
due to inconsistent dwell times. - “Geographically correct” proto-freelance concepts may leave out
desired prototypes or locations, requiring some compromise. - A yard can be too long. – BH
job also performs interchange transfers with
yet another forest products shortline, Anderson
& Middleton’s Westpine operation. It’s
also the point where helpers get added for the
northbound run to Snowline.
LDJ-71 First Quarter 2023 15
line O&NE Scanlon yards has turned out to
be a bit awkward in that it is more or less in
the middle of the layout. This wasn’t the original
intention – the plan was to have lowerdeck
staging leading into a helix which would
dump out directly into the terminal complex
on the main deck. But as mentioned earlier,
when I unwound the helix into a peninsula it
placed the terminal between two passing sidings
to the north of the terminal complex and
three to the south.
Central yards harder for TT&TO
This is a compromise I would make again;
as it allowed me to convert a hated helix into
a scenic highlight and extend the visible mainline
by more than fifty feet. But operationally
the mid-layout terminal does not conform
well to Timetable-and-Train-Order (TT&TO)
operations because the dispatcher has limited
awareness as to what trains are up to while
working in the terminals in the middle of their
runs. It’s tough for the dispatcher to react to
unpredictable departure times; not only for
trains entering the layout from staging yards
at both ends, but for trains exiting the central
terminal complex in both directions as well.
It would’ve been better to have terminals on
View Dean’s layout on his YouTube channel:
www.youtube.com/@oregonjointlinemodelrailro4125
“… better to have
terminals on both
ends with five
passing sidings
between them.”
both ends with five passing sidings between
them. For now we continue to use our unique
form of Timetable-and-Train-Order to keep
things moving.
I plan to open the layout for tours and op
sessions during the 2023 Dallas/Fort Worth
NMRA convention, so I hope to see many of
you there.
LDSIG Web Volunteers Needed
We need two volunteers to help with the LDSIG’s website
to replace those who have stepped down due to other
commitments.
Web Content Manager
The first position would be great for anyone who is
comfortable with a computer and using the Internet. The
Web Content Manager will publish content to our web page,
currently on a Squarespace hosting platform with a simple
user interface. This will move to a WordPress solution in the
future.
The Web Content Manager will receive posting requests
from a handful of volunteers and then publish them to the
web page. Little to no programming knowledge is needed
and training will be provided. The volunteer should have a
good internet connection and be comfortable working on a
computer. If you are interested in this role, please contact
Chris Mesa at cmesa57@gmail.com
Webmaster
The second position is LDSIG Webmaster: Along with
Chris, this person will help migrate the site to a new platform.
The volunteer should know about web page development,
have a good internet connection, and php language
knowledge would be helpful. The tasks that we will be doing
include:
- Development of a new proof-of-concept for a new website
- Migrate the current dual website (.net & .org) to a single
WordPress platform - Migrate current php databases and interfaces to the new
platform. - Improve LDSIG Primer usability.
If you are interested in the Webmaster role, again please
contact Chris Mesa at cmesa57@gmail.com
LDJ
LDJ
16 Layout Design Journal www.ldsig.org
Roll-under Benchwork
“People tunnels” ease wiring and maintenance
Story and images by Jerry Hoverson
Welcome to the Rocky Mountain Central
(RMC) and the Colorado Pacific (CP).
The RMC is the HO standard-gauge half of
the layout and is based on the Denver & Rio
Grande Western. The CP is the HO narrowgauge
half of the railroad and is based on the
Rio Grande Southern. The CP is a subsidiary
of the RMC and provides raw materials such
as coal, lumber, produce, and livestock to the
RMC for processing into finished products.
These finished products are then distributed
between RMC territory and CP territory for
consumption.
The overall track plans at left show the
Staging level under the Main level. Black lines
are RMC standard gauge, blue lines are CP
Narrow Gauge, and red lines are dual-gauge.
The RMC trains are turned on the staging wye
under the CP by the dispatcher using JMRI*
and cameras. The CP staging is a reversing
loop with three tracks that each are electrically
divided into three sections – so nine trains can
be stored. Again, the dispatcher will run a train
around the loop from Buena Vista to Leadville
using JMRI and cameras.
House-hunting with an eye to
elevations
The unique aspect of this railroad is the
benchwork and height of the layout. My previous
layouts pretty much all followed standard
benchwork designs and heights – and
those worked out fine at the time. However,
as all of us do, I got a bit older and then had
hip-replacement surgery resulting in not being
as flexible as I used to be. So, when the wife
- Java Model Railroad Interface
www.jmri.org
Room
Entrance
Room
Entrance
RMC
Std. Gauge
Dual Gauge
CP Narrow
Gauge
1-foot grid
Not reproduced to scale
Jerry’s HO layout is inspired by famous
Colorado railroads. Staging tracks are
managed by video monitor and JMRI software.
Nominal visible track height is 65”,
but this is reduced to his ideal 44” effective
elevation by raising the aisles to 21” above
the floor. This results in room below the
benchwork for roll-around access.
LDJ-71 First Quarter 2023 17
wanted more land to be able to garden on, we
started looking for a new house.
Quest for 12
One of the main criteria was to have space
for a new layout, of course. But not just any
room – I was looking for a room with a 12’
high ceiling. The idea was that I would build
the layout high enough to walk under the layout
to do all the electrical work. Well, as luck
would have it, nothing was available with 12’
ceilings. And then our house sold and we had
to get moving (pardon the pun). We found our
current home with an outbuilding that was big
enough and had 10’ ceilings. The deal was
made and planning began.
Wheels are wonderful
With 10’ ceilings I could still accomplish
my goal but would have to sit on a rolling
stool instead of walking under the layout. As it
turns out, this worked out much better anyway.
The first thing I did was to purchase a rolling
stool, sit on it, roll against a wall and make a
mark on the wall for the bottom of a 2X4 that
would support joists for the layout (photo top
right). This gave me approximately 4’ clearance
as I worked under the layout
on a stool – without having to crawl
around on my hands and knees.
Once minimum standards were
determined, construction began using
2X4s, a framer’s nail gun, and
Liquid Nails™. Each section was
pre-built, just like the walls of your
house, and then set in place using
Liquid Nails to secure it to the concrete
and then nailed to the section
next to it.
The ideal elevation
For those of you who need to
know the numbers: the staging level
is 58½” above the floor and the
main level is 65” high. OK, that’s
a little high for viewing and operating,
which means the aisleways also
needed to be raised. I typically like
my layout at 44” elevation; that’s
what is comfortable for me and
still gives me a long-enough reach.
So doing the math, 65” minus 44”
equals 21” high floors in the aisles
(see photo at right).
Jerry’s friend Bart, the Vice President of the
railroad, testing out the clearance for the
future rolling access beneath the finished
benchwork. 2X4 construction supports the
1X4 joists. (Sadly, Bart is no longer with us as
he passed away a couple of years ago. – JH)
Many interesting elements are in view here. Note the raised plywood aisleway
floor, sturdy 2X4 construction, hard-surface Masonite skirts replacing the typical
fabric, and AC convenience outlets. Valances were built along with benchwork
for easier access, suspended from the ceiling. Track plans must be solidified
before building in this fashion!
18 Layout Design Journal www.ldsig.org
Oh, I also wanted a valance – so that had
to be built at the same time so I wouldn’t have
to lean over the built-up layout to install it.
The valance was built the same way, but using
1X2s instead of 2X4s and then hung from the
ceiling with anchors and screws.
Hiding the clutter, er, storage
Another advantage of this method of
benchwork is that it allows for a hard-surface
skirt below the layout instead of hanging fabric
under the fascia to cover all that ugly stuff
under the layout. I used Masonite™ for that
purpose. If you look closely, you will also see
electrical outlets on the skirt that provide power
for tools, vacuums, and whatever needs it.
I then built view-block walls down the
middle of the peninsulas that only reach from
the top of the joists to the ceiling (photo top
left). These were also covered with Masonite.
I curved the Masonite in the corners using a
24” radius to provide a seamless transition and
then continued the Masonite along the outside
walls (photo middle left). This gave me
a smooth surface to paint sky and clouds then
add slight relief to the backdrops.
The final step before laying track was to
paint all the surfaces (photo bottom left).
Accessing the access
So now you ask, “How do you get under
there to do your work?”
The first, and Primary Maintenance Access,
is just as you come in the room (photo
page 19, top left). The blue arrow shows the
access and maintenance path used during operating
sessions (if necessary) so as not to disturb
train movements or operators in the aisles.
Note the steps up to layout height on the right
(red arrow). Also note the lighting under the
layout to make work much easier.
There are also two sliding doors under
the layout that can be used to slip underneath
(photos page 19, lower left). One is in the opposite
corner of the layout from the primary
access at the room entrance. There is another
door just like this one in the front corner of the
room under Durango.
Finally, there is a “hidden” access at the
end of the peninsula between Antonito and
Pagosa Junction on the narrow gauge. This is a
lift-out (page 19 upper right), made from blue
foam insulation board and using Geodesic
Foam to create the rocks. This would not have
Horizontal joists have been added on top of the 2X4 framework,
along with framing for the double-sided backdrops. Note that this is
fairly lightweight and reaches to the ceiling inside the valances.
The look of the layout is coming together with a coat of paint on the
valances and backdrops. The roadbed laid in place here is for staging;
standard-gauge RMC in the foreground and the narrow-gauge
CP loop on the far lobe of the benchwork. The backdrop is tied to the
inside of the valance for stability.
LDJ-71 First Quarter 2023 19
(Left)Two sliding doors in the Masonite skirt below the layout offer
access to the “people tunnel” beneath. One is shown here in
the closed- and open positions. Note also the slots in the fascia
to allow access to the staging tracks from the raised aisle. These
additional access points avoid a long walk all the way around the
layout from the primary access.
The large liftout in the photos above is
another access point at the end of a
peninsula. Made from lightweight blue
extruded foam with resin rock castings, it
is easy to move and resistant to chipping
and cracking. Note steps down to the
floor from the raised aisle.
At left is the main entrance
to both the layout (red arrow)
and the subterranean
access “tunnel” below the
layout (blue arrow). Only a
couple of steps are needed
up to the raised floor; and
a rolling stool eases movement
within the access
space, which is well-lighted.
The sign on the fascia
reads: “Welcome to Jerry’s
Station; Presenting the
Most Scenic Routes in
America” (echoing the tourist
marketing slogan applied
to the D&RGW narrow
gauge in the 1950s).
20 Layout Design Journal www.ldsig.org
Walkin’ and Rollin’
Jerry’s construction concepts are similar to some published walkunder
designs, although those often require even more vertical height
in the room to allow true walk-under access. John Armstrong described
the idea for the “Petrograd Society of Model Engineers” design in
Creative Layout Design (Kalmbach 1978, out of print). It’s also seen
on the California Central Model Railroad Club layout in Santa Clara,
CA, designed by LDJ author Rick Mugele. A very large and well-known
example is the La Mesa (San Diego) Model Railroad Club’s Tehachapi
layout (designed by Anton Andersen and David Willoughby). A number
of club and large home layouts have walk-under portions.
A real advantage of Jerry’s method is that it does not require
exceptionally high ceilings or a lot of steps up to the aisles. Rolling
around on stools allows easy access with less benchwork material than
full walk-under – and would be possible in more rooms. While this does
not extend the usable length of the layout, as would mushroom-style
benchwork, it does offer an interesting alternative to traditional singledeck
layouts for easier wiring and maintenance. – BH
been possible using plaster – it would have
been way too heavy and chip too easily.
Access – and more!
There are a few more advantages to
using this technique. First, 2X4s are typically
cheaper than 1X4s with 2X2 legs and
the build goes up much faster, especially if
you have a framing nail gun and compressor.
Second, the layout is super strong; in
fact you could support yourself on top of it
and be confident it will support you. Third,
the raised aisles provide storage space
under them for anything that would normally
be stored under the layout and either
seen or hidden with a fabric skirt. Fourth,
as I mentioned before, the hard-surface
skirt below the layout provides a space to
mount electrical outlets, so you are never
far away from power and don’t need extension
cords. Fifth, it presents a neat, uniform,
and professional appearance to the
layout that lets the visitor concentrate on
the layout itself – not the junk under it.
One final advantage is that the electrical
connections for the layout can now
be mounted horizontally on the inside of
the wall (photo at left) and that minimizes
the amount of work you must do over
your head on the bottom side of the layout!
Saves a lot on the neck strain!
If you’re planning to build a new
layout, I hope you’ll consider this
technique. And I hope that you will visit
during the 2023 National Convention here
in North Texas.
How nice to be able to install and maintain
wiring in a spacious and well-lit place! Jerry
works comfortably at eye-level, thanks to
a rolling stool. Tools are right at hand, and
wiring documentation is posted nearby.
At the bottom left is seen storage under
the raised aisle floor. This photo was
taken below the Glenwood Springs/Grand
Junction lobe of the layout.
LDJ
LDJ-71 First Quarter 2023 21
Appalachian Town in 10 Turnouts
Two railroads serving natural-resource industries
by Richard Turton
My railroading interests are focused mainly
on the Appalachian region (see the story on
Richard’s layout in LDJ-69, Second Quarter
2021). As such, raw material processing (coal,
coke, and sand) and glass manufacturing
are areas of modeling interest to me. What I
wanted to do in this “challenge” was to see
if I could combine all these industries into a
simple layout plan that would provide a realistic
setting with significant operating interest.
Two-railroad town
The fictional town of Glassko, unlike its
phonetic Scottish namesake, is located in the
Appalachian region of the Eastern United
States. The town serves as an interchange
point between two eastern railroads, for example,
the B&O and Western Maryland. The
railroad coming from the east (right on the
track plan below) is designated “ER” and the
railroad coming from the west (left) is designated
“WR.”
The ER serves two industries in Glassko,
namely a sand processing plant and a glass
plant. The WR serves a coal mine and a beehive
coke facility in Glassko. These four industries
are somewhat interdependent and
allow cars to move between them as well as
to and from staging. There is an interchange
track between the ER and WR included in the
track plan. Typical operations are discussed
later in the article.
A linear plan for any shape
The HO track plan is C- or U-shaped.
However, it could be straight or L-shaped depending
on the space available. The design
uses #5 turnouts throughout and has a minimum
radius of 27 inches. Each industry has
access to a runaround; and this accounts for
Richard’s ten-turnout track plan centers on relatively large natural-resources industries.
Tall structures like coal tipples and water towers help disguise the entrances to staging for
the two railroads that meet in the imaginary Appalachian town of Glassko. Numbers on
the plan are the count of turnouts.
“… a realistic setting
with significant
operating interest.”
22 Layout Design Journal www.ldsig.org
eight turnouts with the interchange taking
the final two turnouts and a crossing.
Staging for both the east- and westbound
traffic is comprised of cassettes that lift in
and out of the staging areas.
The design is relatively simple
in the interest of making switching
straightforward, with the interchange
track adding interest as small loads from
the mine and glass plant are interchanged
between railroads. The coal and coke
facilities are on a branch line of the WR
that terminates in Glassko. In real life, it
would be unlikely that both the ER and
WR branches would terminate in Glassko.
However, for the sake of this design,
through traffic operations, going west on
the ER, are not simulated.
The coal and coke plants utilize separate
tipples. The coke plant is supplied its
raw material (coal) from a mine tipple via
a separate designated track. The idea is
that a “larry car” shuttles from the tipple,
where it takes on coal, to a beehive oven
where it dumps the coal load through
a hole in the top of the structure (photo
above left). The larry car then returns to
the tipple to collect more coal and repeat
the process for the next coke oven. Visually,
this makes an interesting feature, especially
if it is automated with the larry
car moving back and forth for the period
needed to charge all the coke ovens.
Coal and Coke are King on the WR
Operations on the WR allow for coal
trains of five 55-ton hoppers to service the
mine with empties coming from the west and
full loads returning to the west. In a similar
manner, trains of three empty gondolas move
from west staging to the coke plant and return
to the west with full loads of coke.
Because the track running from the tipple
to the coke ovens is elevated by 10-15 scale
feet, it is difficult to have a single tipple serving
both the mine and the coke ovens. Therefore,
a separate tipple is used for the coke ovens.
The location of this tipple is chosen to act
as a view block for the point at which the ER
passes through the backdrop.
Frequency of traffic might be one coke
train for every two or three coal trains. The
movement of coal and coke trains provide a
significant amount of switching on the WR.
This fascinating photo from 1974 at Bretz, West Virginia shows a battery
of coke ovens in various stages of being emptied and loaded. The selfpropelled
larry car above the ovens charges them with coal. The ovens
are then bricked-up and the coal is heated in the absence of air to create
coke. Once processed (and quenched with water), the still-hot coke is
raked out and loaded into hoppers or gondolas for delivery to customers.
Richard’s plan is based on a similar set-up with the larry car track
about 10-15 feet above the coke ovens and serviced by its own tipple (not
shown). In the photo, a movable conveyer is being used to transport the
coke to waiting railcars. Photo by William E. Barrett for the National Park
Service and placed in the Public Domain. Library of Congress Historic
American Engineering Record HAER WVA,39-BRETZ.V,1-4.
Tips … - A location with two mostly independent railroads can support
two operators with a relatively simple track plan and basic wiring,
if desired. - Interchange focused on a small amount of local industry-toindustry
shipping is plausible, especially for bulk commodities that
load- and unload easily. - Cassettes and other removable staging allow quick swaps of
open-top loaded and empty cars. – BH
… and Trade-offs - In order to make operations on the four industries relatively
straightforward and avoid a timesaver/puzzle situation, eight of the
ten turnouts were used to provide runarounds at the four industries. - Once the interchange was added, the only way to provide enough
staging was to use cassettes, which is somewhat inconvenient. - Through traffic for the ER passing through Glassko is not
simulated. – RT
LDJ-71 First Quarter 2023 23
In conjunction with the regular movement of
coal and coke into and out of staging, the glass
plant situated on the ER requires one or two
loads of coal per week/operating session to
fuel the glass furnace. By agreement between
the ER and WR, this is supplied by the local
mine via the interchange track.
A railroad with glass
Looking now at operations on the ER, the
main traffic focuses on covered hoppers that
ferry sand product(s) from the sand processing
plant to staging with empties being shuttled
from staging to the sand plant. However,
one or two carloads of sand per week/operating
session are required as raw materials at the
glass plant and so some of the covered hoppers
move away from staging and head down
the track via the crossing to the glass plant.
Sand represents about 70% of the raw materials
required for glass production with the
other 30% of raw materials comprising fluxing
agents (soda ash), dolomite (to reduce viscosity
and improve scratch resistance), limestone,
and pigments. All the raw materials would be
transported by covered hopper, except for the
pigments that would be sent by box car. Thus,
covered hoppers from other railroads will appear
in order to supply the bulk ingredients.
Some of these cars and/or the box car
with the pigments could originate from the
WR staging and require being left in the interchange
for final delivery to the glass plant.
Likewise, finished glass products would be
shipped by box car and some could head west
via the interchange as well as east. A water
Glass Plants are typically huge, but this 1974 photo of a portion of the
famous Seneca Glass Company in Morgantown, West Virginia shows
a lot of verticality that would be useful in suggesting scope but without
requiring too much surface area on this track plan. Another photo by
William E. Barrett in the Public Domain. Library of Congress
HAER WVA,31-MORG,1–1
tower was also added to act as a view block
for the WR passing through the backdrop, like
the tipple for the coke plant.
Fun for one … or two
In conclusion, there is a wide variation in
the operations and rolling-stock types associated
with the small town of Glassko – I think
such a layout could keep a pair of operators
busy for many hours.
LDSIG Back Issues – a valuable resource
Every issue of the Layout Design Journal (and the
earlier Layout Design News) is packed with design ideas,
tips – and of course, lots of track plans as examples for
layouts large and small.
Nearly all past magazines are available as paperback
issues for purchase. Convenient on-line indexes will
guide you to articles covering the concepts, techniques,
and layout keys that will help you learn to “Make Only
New Mistakes” – order today! See:
www.ldsig.org/ldj-index or
www.ldsig.org/ldn-index
… for descriptions.
And visit:
www.ldsig.org/publication-back-orders
… to download a Back-Issue Order Form
LDJ
24 Layout Design Journal www.ldsig.org
10-Turnout Branch Terminus
Portion of a larger design refined as a standalone layout
by Robert Stafford
Pen Argyl Branch
HO scale, 2’ X 9’6” plus staging
1 foot grid
24” min. radius
Atlas Code 83 #4½ (“#4”) turnouts
No grade
Hyatt School Slate Co.
Pen Argyl Milling Co.
Albion Vein Slate Quarry
Slate Scrap Pile
Freight House
R&R Toy Mfg. Co.
Staging
The line from the Pen Argyle scene in the closet connects to the rest of the layout on the
author’s home plan. For this article, he has substituted a small staging yard. He plans to
remove the closet doors. Track and industry arrangements don’t duplicate the prototype
location exactly, but the types of commodities handled are the same.
When I designed the trackage to represent
Pen Argyl, Pennsylvania on my HO Bangor
and Portland Railway, I realized after the fact
that it was a 10-turnout-or-fewer track plan.
The track plan is designed to fit into the closet
of a 10’ by 12’ bedroom that I will be using to
construct my new layout.
Inspiration, not replication
On the prototype the Pen Argyl Branch
left the main track at Pen Argyl Junction and
extended about two miles total into the east
side of the Borough of Pen Argyl to the freight
house. (The map on page 25 does not include
the branch.)
Two tracks extended beyond the freight
house, one several miles long, to service several
slate quarries and a structural slate factory.
Just beyond Pen Argyl Junction was a
5-car double-ended spur that originally served
the Albion Slate Quarry. In later years it was
used as a team track.
The track layout (lower left) is not in any
way true to the prototype. It was designed to
fit inside of a closet and does not reflect the
actual layout of the trackage at Pen Argyl.
Likewise, the industry buildings are structures
I had built for my prior layout and are not actual
models of buildings located in Pen Argyl.
“Slated” for operation
The trackage into the Albion Quarry is
more representative of the two spurs that
served the Jackson-Stevens Quarry. One of
the stub spurs runs alongside a sand storage
bin and a boxcar loading platform. The other
stub spur is used to unload hopper cars of anthracite
coal for the boiler house and for use in
the slate shanties which each had a coal stove
in them for heating. The hopper cars are unloaded
using a portable conveyor belt to move
the coal to the ground storage pile.
Hyatt School Slate Factory was an actual
industry in the Slate Belt located at Bangor.
They shipped out box car loads of school
slates. This building is a modified Walthers
Cornerstone Greatland Sugar Company kit.
LDJ-71 First Quarter 2023 25
R&R Toy on the prototype used the Albion
Runaround Track as a team track. They
received inbound box cars of polyfill for use
for stuffing the stuffed animals they manufactured.
The polyfill came from a southern location
in Chesapeake and Ohio box cars. R&R
Toy shipped out boxcar loads of stuffed animals
to various retail distribution centers on
the east coast. This building is scratchbuilt.
On my own version of this layout, I will
include a non-prototypical rail-served dairy
(see sidebar bottom right). But for this story,
I have instead placed a feed dealer, which receives
box cars of grain and additives to make
livestock and poultry feed. The actual Lackawanna
Bangor and Portland Branch had two
such mills located elsewhere. I also plan to
scratchbuild a model of the brick freight house
that the Lackawanna built to replace the original
wooden station.
Operating the branch
The Pen Argyl Branch was served by the
Pen Argyl Drill (photo middle right). This job
came on duty at the branch’s Bangor Terminal.
The drill went to Pen Argyl, did the local work
there, and then went down the Martins Creek
Branch to interchange cars with the Pennsylvania
Railroad and the Lehigh and New England
at Martins Creek.
On my own layout the branch trackage
comes off the rest of my railroad at Pen Argyl
Junction. For this article the connection to the
main track is represented by a staging track on
which the inbound train can be assembled.
If you have the room for a runaround track
and two storage tracks this would allow you to
switch out your train after arriving from Pen
Argyl and building your next inbound train to
go to Pen Argyl. If the length of space is restricted,
a sector plate could be used instead of
a switch and tail track.
The Pen Argyl Drill will come up the
branch from staging on this layout. After
switching the industries at Pen Argyl, the crew
will return back to staging. After a runaround,
the crew will build “tomorrow’s” train in the
clear track it used for the runaround move, and
then set its (now) inbound train over onto the
storage track.
Depending upon the era you are modeling,
a wide variety of locomotives have been used
on the Pen Argyl Branch: from 2-8-0 steam to
ALCOs to EMD Geeps.
The Bangor and Portland Railway was acquired by the
Delaware, Lackawanna, and Western in 1903. After many
mergers and acquisitions, portions are now operated by Norfolk
Southern. Public Domain map via the Open Street Map project
The Pen Argyl Drill is spotting boxcars at the freight house for slate
loading in June of 1974. Erie Lackawanna ALCO C424 #2403 has a
year or two more before Conrail takes over. Note that the caboose is
for now just two cars back of the engine as the crew does their work
amidst the weeds. Robert Houser photo, used with permission.
Got Milk?
I have memories as a kid of the Lackawanna Railroad’s milk trains
that operated on the Sussex Branch in northern New Jersey. I wanted
to include these memories on my model railroad. My dairy building is
kitbashed from two Walthers Cornerstone Brookside Dairy Kits. It will be
serviced by a daily train to take the milk to Hoboken, New Jersey for use
in the New York City area market. (There actually was a Slate Belt Dairy
that processed locally produced milk for local distribution in the modeled
area, but it was not rail-served.) – RS
26 Layout Design Journal www.ldsig.org
Making a layout from a closet
I am removing the doors from the closet. I
will build a shelf with a valance above the layout
to frame it into the closet like a diorama.
LED strip lighting will be installed under the
shelf to light the layout. I plan on painting the
valence and fascia of the layout black to finish
that museum diorama look.
(Above) Photo taken from the
Albion Vein slate scrap pile
showing the quarry hole as
a Lackawanna train pulls up
the Pen Argyl Branch in the
background in 1958. Pen Argyl
Junction switch is just beyond
the rear of the train. Photo
by Martin Ealey, used with
permission.
(Right) Passenger-equipped GP-7s like
1400 later moved to freights. The first
two 40’ boxcars were empties pulled from
Flory Milling in Bangor. They held bulk
grain with paper grain doors. You can see
remains of a grain door and grain dust
from unloading on the side of the cars in
this1974 view. Robert Stafford photo.
(Left) My photo of the slate quarry trackage
I built for my former model railroad.
Slate scrap pile made from actual pieces
of slate from a scrap pile in Pen Argyl. First
track has a boxcar spotted at the loading
dock. The sand bin can be seen in front of
it. Second track is the coal track with a car
of anthracite coal spotted to it for unloading.
I saved this scene for reuse on my new
layout as the Albion Vein slate spur. – RS
LDJ
LDJ-71 First Quarter 2023 27
Building to Move
Sectional benchwork to ease transport, preserve modeling
Story and images by Eric Hansmann, except as noted
Some of us end up in jobs where a move
to a new office and city are regular employment
features. Frequent uprooting can inhibit
our layout building desires. If we rethink our
designs to incorporate sectional layout benchwork,
a layout can move easier and set up
quicker in a new home.
Can’t wait to build
After my wife and I moved to El Paso in
2012, I was hungry to build an HO scale layout.
We moved into a rental home at first. A
spare bedroom was available with a 10’ X 16’
overall space, including the closet area. I knew
we would purchase a home soon and move
again, but I wanted to build a layout. I decided
to build sectional benchwork so the layout
could move easily to a new home.
I considered a couple of prototype locations.
After doodling track for one idea, I decided
to keep it simple for the tight space. It
would be easy to add more, but it could soon
enter the realm of putting ten pounds of sugar
into a five-pound bag. “Keep it simple” has
become a hobby mantra for me since this time.
Wheeling is appealing
I had stumbled upon the Baltimore & Ohio
(B&O) freight terminal in Wheeling, West
Virginia while researching at the National Archives
and Records Administration Archives
II facility (photos at right). I bought a copy of
the Wheeling valuation map on a whim, as it
looked cool. It became my primary inspiration
for the new layout. After several sketches and
consultation with friends, a plan was finalized
to fit sectional benchwork (plan page 28).
Sizing it up
I decided on a basic 2X4 foot section
size that merged Free-mo (www.free-mo.org)
module ideas with David Barrow’s domino
layout design. Modules were built using threequarter-
inch-thick birch plywood ripped to
three-inch width. End plates were six inches
wide to follow the Free-mo standards. I
attached quarter-inch thick Luan plywood on
risers to cover the sections.
Spoiler alert: The
photo at left is an
even more recent
move – but the selfboxed
and wrapped
layout sections seen
on the right are the
same.
The former B&O Freight House in Wheeling was photographed by
William E. Barrett in 1974. A side view of the headhouse is above,
and a view from the river side of the headhouse and shed is below.
This area and facility became a focus for Eric’s layout planning.
Photos from the Library of Congress in the Public Domain, locators:
HAER WVA,35-WHEEL,4—9; HAER WVA,35-WHEEL,4–15
28 Layout Design Journal www.ldsig.org
The layout plan incorporated three prototype elements of the B&O facilities in Wheeling, West
Virginia. The offset along the far side of the yard (red arrow) was to accommodate a wall bumpout
in the original room.
Inbound and outbound yard
Freight dock track
Clean-out track
Team Yard
1 sq. ft.
Freight House
B&O Wheeling, WV Freight Terminal
HO scale, about 10’X16’ overall
24” Minimum radius
FastTrack turnouts
Crossover and I/O Yard #6, balance #5
No grade
(Middle right) Five of the layout sections were built
to the same design. The section under the team
yard was a slightly different size. The two freight
house sections used benchwork from a previous
layout. They were the same size as each other,
but larger than the rest. Note the wider end-plate
flanges to allow C-clamping sections together.
(Below) Risers were added to each joist and then
cleats attached and leveled using a straight metal
section of a former shower enclosure.
Finally, each section was capped with quarter-inchthick
Luan sheet, as seen at bottom right. Removable
legs include levelers.
LDJ-71 First Quarter 2023 29
Brushing, clamping, and sticking
I like to paint the roadbed before installing
track. Scenery wasn’t a focus of the layout, so
a grey shade was used (page 28, bottom right).
Once the sections were set-up on legs and
clamped together, track was positioned on
the plywood and the center lines were drawn.
Since the sections are intended to go together
in one specific arrangement (unlike standardsbased
modules), I drew the track plan without
too much regard to where the track crossed
benchwork joints.
I used caulk to secure the track onto the
plywood (photo at right). Once the caulk dried,
the rails were cut flush with the ends of each
section with a Dremel tool, and then dressed
with a file (middle right).
Time to operate!
The layout was up and running within
months. Several operating sessions were
held from early 2013 through to the spring of
- Two-man crews were employed. One
crew worked freight house duties and the
other worked the team yard. Crews pulled and
spotted 90-95 total freight cars in a three-hour
session. Their final jobs were to sort outbound
cars for five B&O destinations beyond
Wheeling, plus a clean-out track.
And then, time to move (twice!)
Shortly after the Wheeling Freight
Terminal was built and running, we bought a
home and the layout was moved across town.
The 2’X4’ sections were easy to handle and
move in my SUV. The layout was set up in
a slightly larger hobby space and back in
operation within a few weeks after the move.
A bigger move came in the spring of
2017, as my wife accepted a job in middle
Tennessee. My thoughts turned to moving the
layout and how to minimize the handling and
damage by commercial movers. Many of the
sections were the same size, so these could be
(Top right) Track was attached directly to
the painted surface using silicone caulk.
(Middle right) Each track was cut flush with
the ends of the sections.
A scrap end panel has been installed to
prepare for a move at bottom right. Another
similarly sized section will be secured
upside-down above this one.
set up like a box with track-sides face-to-face
(bottom right, see also page 30).
Thinking inside the box
Pieces of scrap paneling left over after we
remodeled the kitchen and living room were
30 Layout Design Journal www.ldsig.org
used to anchor two layout sections together.
track-side to track-side. Other paneling
sections were cut and fit to the underside of
the layout sections to protect the wiring and
track switch controls. A box was created with
components and layout sections, making the
layout easier to move (photo top left).
More to protect
After the sections were boxed up, I realized
the ground throws needed to be protected. I had
mounted these on fascia ledges to control the
track switches from the aisle. I wanted them to
bend the rails when they throw a switch. With
the rail height at 50 inches from the floor, I
didn’t want crews to reach into the layout to
operate a ground throw.
The ground throw ledges jutted out from
the fascia and could easily be damaged when
the sections are loaded into a moving van,
or when things shift in transit. I used more
scrap panel board as shields to protect these
elements (middle left). Since they looked like
convenient hand-holds, I added a warning so
that the moving crews would not use them as
handles (bottom left).
A new space
The layout sections arrived undamaged
after the cross-country move. Our new
home was another rental. A spare bedroom
had just enough space to set up the layout.
I encountered a few issues lining up the
layout sections. Each leg has adjustable feet
to fine‑tune leveling. The sections where
tangent track crosses the joint were easy to
massage into form. The sections where track
At top left, four layout sections are fastened
into two boxes and nearly ready for the
moving van.
(Middle left) Safety shields were installed to
protect the ground throws that were mounted
on fascia ledges. Scrap lumber was
used to support the thin plywood shields.
The layout sections are boxed up and
ready for the moving van at bottom left.
The plywood shields protect the fasciamounted
ground throws and those areas
where the track curves off the layout section
flush with the edge. These are labeled
in large lettering to caution movers against
using them as handles.
LDJ-71 First Quarter 2023 31
curves across the benchwork joints required
additional attention (photo top right).
The layout was up and operating for a
couple of months before we bought a home in
Tennessee. The sections were packed again for
a move across town. I had hopes of converting
the garage into a hobby haven, but the metro
Nashville area is booming and this job was
deemed too small by contractors. The sections
remained boxed-up and standing on edge in
the garage.
Again?!
After sitting in the garage for five years,
the layout sections were packed again for another
move. They arrived safely and are now
stored in the new basement space awaiting the
moment when I can unbox the units and set up
the layout in a finished room.
Lessons learned
Building a layout using sections of similar
dimensions was an important part of safe
cross-country moves. The layout did not have
scenery, so the track side of the sections could
be positioned closely together to minimize the
sizes of the “boxes.” Sections don’t all need to
be 2’X4’, but pairs of sections with the same
dimensions ease the work to make these into
box structures.
Too many curved tracks crossing section
seams may require tedious realignment.
Covering the underside of each section
is key for protecting wiring and mechanical
elements. Cheap paneling worked well for the
covering.
Mark the sections with large letters if there
are issues the moving crew needs to know.
While I stated clearly to the crew about what
isn’t a hand-hold, the ground-throw shields
marked as “NOT A HAND HOLD” reinforced
my instructions. I noticed a couple times a
crew member had grabbed a shield, saw the
note, and changed their grasp before picking
up the boxed sections.
Attach the sections securely and don’t
worry about screw holes in visible locations.
The goal is to get your layout to a new place
without damage. With foresight and care, your
layout can be up and running within weeks
after you move.
More of Eric’s modeling and design ideas at:
www.designbuildop.hansmanns.org
These tracks needed extra alignment attention for reliable operation.
Future layout ideas will incorporate hexagonal corner units to minimize
curved track across section seams. [Note also Eric’s fine modeling
and weathering, especially on the boxcar at right. – BH]
The freight house layout sections were lined up and connected, ready
for operation. The layout has since been moved again (early 2023),
so Eric hopes to set-up the sections soon in the basement of the family’s
new home.
LDJ
32 Layout Design Journal www.ldsig.org
One or Two Tracks (or Both)?
Considering layout purpose, operating style, and more
Story and images by Robert Perry, O.D., except as noted
The question has often been asked, on the
Internet and elsewhere, “Should I have one
or two tracks” (Single- or Double Mainline).
With no additional information or details; this
is a tough question to answer. Because, as
written, the question is too vague to answer.
If the writer were asking about a publicdisplay
layout, I would say two tracks – since
the non-model railroading public is more
interested in seeing action (trains moving)
rather than observing a realistic depiction of
railroading.
Timeless good advice
But if the writer were asking about a private
home layout (especially with an operations
focus), I would say one track. Why do I
believe this? Famed Model Railroader author
and Editor Linn H. Westcott wrote: “A twotrack
mainline is obviously suited to running
two or more trains. Put one on each track and
just let them go. If this gets boring, as it will
for many, then you need something more challenging
for the [one] who is controlling the
trains.” Mr. Westcott wrote that sometime
around 1956. That quote really struck me
reading it in the early 1970s; and has stuck
with me to this day.
Technology offers options
This issue has become even more important
as most layouts these days utilize some
form of Command Control (such as DCC)
and so there is no longer any need for flipping
toggles to control blocks to allow for user-intensive
control of multiple trains.
For many of us, simply watching trains on
separated tracks does get boring pretty quickly.
And for these builders and operators, more
operating challenge becomes important.
A layout with a non-interacting doubletrack
mainline is, in my opinion, just a diorama
that has motion. Many model railroaders
would rather strive, to some extent, to reproduce
what goes on in prototypical operations
of a real railroad. That does not mean that display
layouts, toy trains, etc. have no place in
the hobby, but to obtain and maintain interest
for many, participation is key. For these folks,
simply watching a display layout is boring.
Engagement and interaction
The absolute, most critical element of a
successful model railroad (not a display layout)
is: participation. That requires serious
consideration and thought in the preliminary
design phase of your project about how you,
and others, are going to be actively participating
in the operation of your model railroad.
This critical point was stressed many times in
the layout design book by John Robert Coy,
entitled Model Railroad Custom Designer (24
Hour Books, Inc.; 2017).
Participation is routinely overlooked by
the novice and/or inexperienced model who
is primarily concerned about how the track
should be arranged. This is a critical error, in
my opinion.
Prototype vs. model
Prototype railroads were not concerned
about their track arrangements first. Their focus
was on how to get paying customers to actively
utilize their railroad as: investors, passengers,
or freight clients. Then they laid their
track to enable that utilization. As such, track
plans were based first on the location of their
expected customers and their shipping or passenger
needs; and secondly on the most inexpensive
and safest way to lay tracks between
points A and B.
Options Add Interest for Double-Track
Robert offers good general ideas about single-track and double-track
mainline designs. More demanding double-track layout design and operating
schemes can be developed to add significant operating interest,
as well. Crossovers between mainlines, larger numbers of diverse trains
(e.g., freight vs. passenger; hot shots vs. drag freights), helper grades,
and other elements can create a lot of challenge for operating crews.
Meets and passes, overtaking trains, station-stops, etc. all create trainto-
train interaction that adds interest. Desired train density during operating
sessions or visitor hours may also impact the choice of single- versus
double-track. As on the prototype, double-track with crossovers generally
permits more trains running in a given time. And replicating specific
prototype areas may demand double-track arrangements as well. There
is not one-size-to-fit-all, but Robert’s suggestion to consider the style and
amount of operation challenge desired is always excellent advice. – BH
LDJ-71 First Quarter 2023 33
In designing a model railroad, we may
have some idea of what kind of terrain we
wish to model, but this is often secondary to
the design. We know we want tracks to traverse
in each direction and from one location
to another, but we seldom consider the terrain
first. Garden railroad modelers may be an exception
to this – as terrain is often the primary
concern (just as it can be with the real railroads).
Terrain constraints
The terrain can often dictate whether there
is room for a double-track mainline in a certain
area or if a single-track mainline must be
shared by trains traveling in different directions.
If a layout is designed with a doubletrack
mainline, one may consider adding-in
features that would create some operating
interest as it would on the prototype. Trestles
and other bridges may be too expensive on
the real railroads in certain locations to allow
a double-track mainline. Limitations to the
available track footprint may exist, such as a
town with pre-existing buildings that don’t allow
room for two tracks – or narrow riverbeds
and mountain steepness or curves.
For these reasons, double-track mainlines
may be reduced to single-track in various locations
such as on a one-track bridge (photo
lower right) or even using a gauntlet track*. On
the model, this can add a significant level of
interest and need for forethought in the scheduling
and control of trains, thus making operating
much more interesting and challenging.
Incorporating into layout designs
This should be a serious consideration in
your design. First, focus on what kind of terrain
you want and how this would typically
affect transportation through the area. Then
consider what industries you want and their
needs. Next, plan how you and others will be
actively involved in the operations and scheduling.
Plan areas of necessary bottlenecks and
- Gauntlet (or gantlet) tracks are areas where
two mainlines (usually) are interlaced and
overlap – but without movable points, so trains
may not move from one track to the other. Although
creating the same dispatching bottleneck as a
section of single track, there are no switch points to
control or maintain. The narrower track footprint
of the gantlet segment is often helpful for tunnel
and bridge clearances. – BH
positive meets (areas where two approaching
trains must maneuver around each other on
passing tracks) and then lastly, complete the
design and lay track.
Some layouts have arranged for interchanges
where one railroad meets another.
If this involves an exchange of rolling stock
rather than just a track crossing, this can also
add operator interest, especially if two crews
are involved in the exchange. Another option
for added interest, if you decide on a doubletrack
mainline, is to create a section of track
that is being repaired with a MOW (Maintenance-
of-Way) train. Now the approaching
trains must change tracks via crossovers or
alternate routes to get to their destinations.
Designing for use
For operations-oriented designers, the first
question should be: “How will I, and others,
be actively involved in the railroad once it is
operational.” For most, the answer would not
be by becoming an idle observer. Especially
with Command Control, it would be very easy
to get lulled into a state of stupor by just walking
alongside a train that has no need for real
interaction on a double-track mainline.
Planning for interactions
Part of the fun of operations to me involves
the cooperation of the train engineers/
conductors/brakemen and the dispatcher.
This impressive trestle near Garry on John and Connie Coy’s O-scale
Glacier Line layout is an example of a long single-track segment that
creates operating challenges for the dispatcher and operators.
34 Layout Design Journal www.ldsig.org
When multiple trains are operating and sharing
trackage, those involved must be acutely
aware of any pinch-points, timetable issues,
MOW work going on, etc.
Communication between operators and
their dispatcher is important in order to know
where and when a train must enter a passing
siding, wait for a train that has priority to
cross a single-track bridge, or whether a crew
switching cars can temporarily enter the mainline.
This can be done, depending on the size
of the layout, via walkie-talkies, closed-circuit
phone system, intercom, or merely by talking
across the room (photo below). An operating
signaling system can also be useful, especially
if it can be over-ridden by the dispatcher when
needed.
In a large yard area there may be more
than one locomotive switching cars at a time,
thus requiring good communication between
the crews. Two-person crews and dividing-up
the duties also make operations much more
fun. The engineer can be running the throttle
while the conductor or brakeman throws the
switches, etc.
Long-term fun and challenge
We are always asking ourselves how we
can get others involved in this hobby. Multiple
studies have demonstrated that the more
a person is actively involved in any activity,
the more likely that person will continue that
activity into the future.
If our layouts primarily operate themselves,
what active participation does that offer
us, or anyone else for that matter? How
would that keep you engaged or interested
over time? Yes, it’s neat and cool to observe
multiple trains running, in opposite directions,
up and down hills, through tunnels, across
towns, etc., but that may not keep the average
person interested.
One recent development in train operation
has been automated train control via Arduinos
or JMRI* utilizing train detection, transponding,
block occupancy, route control and turnout
changes. This is fine for a museum layout
that needs to be operated autonomously but, in
my opinion, I believe operator interaction and
interest is much more important – even though
I enjoy computerization of various aspects of
my layout.
Spectate … or participate?
Instead, how about handing a visitor to
your layout a handheld throttle to control a
train, and instructing them in how to start,
stop, couple, uncouple, blow a horn or whistle,
pick-up or set-out a car at a siding, stop at a
passenger station, or wait in a siding while another
train goes by? Those things mirror reality
and require participation. This requires active
engagement into the operation of the layout
and will gain a person’s full and undivided attention.
This may persuade and encourage that
person to become a model railroader.
Be wary, however, of introducing someone
to operations as a first-timer during a formal
operating session. I have heard many newbies
report that they were overwhelmed and
confused by waybills, schedules, operating
rules, etc. This makes it feel like work to them - Java Model Railroad Interface
www.jmri.org
Arduino is an open-source hardware and software
company, project, and user community that designs
and manufactures user-programmable singleboard
microcontrollers (“Arduinos”). These are
being used for a variety of model railroad applications,
including automated train control.
A much-younger LDJ Editor dispatching on Rick Fortin’s HO 4th
District ATSF layout using a variety of communications tools. The
headset is connected to an FRS family radio base station (silver
with antenna) for communicating with road crews. Rick rigged-up
a prototype foot-switch below the desk for push-to-talk actuation.
A household intercom system (ivory) connects to the Chico Tower
Operator within the yard limits of Orchard Yard. Dispatching was
via Track Warrants. The layout is primarily single-track-withsidings
with a double-track segment for a short distance beyond
the yard. Photo by Rick Fortin.
“Two-person crews
and dividing-up the
duties also make
operations much
more fun.”
LDJ-71 First Quarter 2023 35
and they feel stressed rather than
having an enjoyable experience.
This is the exact opposite of
what the intended goal should be.
[Many layout owners assign an
experienced “mentor” to help new
or visiting crews through their
first operating session(s) on an
unfamiliar layout. – BH]
Lone wolf to team participant
I was a “lone wolf” for many
years. My personal HO-scale layout
is fairly small and is not really
conducive to having many operators
at a time. Recently I joined a
local train club that has a combination
of a generally double-track
mainline that narrows to singletrack
at various locations.
I also became part of the crew
of the Glacier Line O-scale layout
owned by John and Connie Coy in
my town. This layout is also a combination
of single-track and double-
track segments, which I have
personally found adds considerably to my operating
interest.
John Coy often relates Linn’s words and
this prompted his design for The Glacier Line.
It began several years ago with John and his
wife as the only operators. Now, during the
train season in Indiana winters, there are generally
between five to twelve people operating
the layout every other Sunday evening.
Single- and double-track
When operating this primarily single-track
railroad (with passing sidings and spurs), one
must maintain control over his or her train lest
there be a “cornfield meet” somewhere – participation
is paramount! In the “Tour of the
Glacier Line” diagram (top right), one can
see some of the transitions between singletrack
and double-track portions of the mainline.
(This diagram does not show the extensive
main yards and two turntable facilities in
Shelby and Whitefish.)
Trains entering the Goat Lick Bridge
(photo bottom right), the wooden trestle near
Garry and Bad Storm Canyon, or beyond Rising
Wolf all need to be wary of approaching
traffic to yield as needed.
John Coy’s schematic diagram of the 3-rail O-scale Glacier Line shows the alternation
between single-track and double-track segments.
The Goat Lick Bridge is a single-track operating bottleneck between
the multi-track mainline segments in Rock Hill and Walton. Robert
says that engagement and interest is increased through these single-
(story concludes on page 40) track operating challenges.
36 Layout Design Journal www.ldsig.org
Fascia Color Ideas from Display Layouts
by Nicholas Kalis
American layout builders could learn much from their
British cousins when it comes to choosing a fascia color
for their layout. The photographs at right of a putty-colored
fascia on Ian Clark’s Rockingham amply illustrates that
point. The color chosen by this layout builder is a soothing
match for his layout; it does not distract in the least from his
modeling efforts.
Too often green is employed in the US to paint our fascias
when a more fitting color would do better. Another overutilized
(in my opinion) choice for layout fascias is the color
black; I write this knowing full well that black is an effective
fascia color in some cases.
Even worse, we often see a beautifully done model railroad
in the United States that has no paint on its fascia at all.
Indeed, too often the length of time the fascia has remained
unpainted is betrayed by aging of the Masonite™ that has become
apparent by the color change observed in the material.
It is bewildering to this author that someone could put as
much as decades of work into a model railroad only to leave
it unframed without a painted fascia.
So, what is the take-away from these musings? Paint
your fascia sooner than later – don’t let Father Time “paint”
your Masonite through aging – it is a bit depressing to
tell the truth. Second, visit some exhibition
layouts through the Internet to get some
inspiration about how to paint your fascia in a
manner that enhances the visitor experience.
To learn more about fascia treatments, see my
essay in the LDSIG Layout Design Primer:
www.tinyurl.com/PrimerAppearance
P4 and Scalefour
The Rockingham layout was constructed in
a scale/gauge combination called P4: 4mm/ft
(1:76.2 scale like OO; but accurate to-scale track
gauge) – similar in terms of standards and precision
to Proto:87 in the US. Set in September 1929, the
layout was exhibited in several shows until 2009,
after which it was installed in the owner’s loft.
Scalefour is a finescale outgrowth of the P4 scale/
gauge combination. For more information, visit:
www.scalefour.org
This slightly lower-resolution photo of Ian Clark’s
Rockingham display layout shows more depth of the
putty-colored fascia than the photo below. The color
palette of the layout and fascia are somewhat muted for
a balanced and coordinated appearance.
This better view illustrates Ian Clark’s exceptional modeling. This
image is from Ian Clark’s YouTube video of his layout, posted as
part of a Virtual Scalefour North International 2021 exhibit.
https://youtu.be/SA0dETbah3c
Visit the LDSIG on the Internet
Main Site: www.ldisg.org
Groups.IO Discussion Forum: https://groups.io/g/ldsig/topics
Facebook Discussion Forum: https://www.facebook.com/Layout.Design.SIG
LDSIG Layout Design Primer: https://ldsig.net/o/ldsig/wiki/index_title_Category_Primer.html
Join/Renew: https://ldsig.net/membership/
LDJ
LDJ-71 First Quarter 2023 37
Stories coming soon to the LDJ … along with many more …
Free Future LDJs for Your Articles – it’s Easy!
by Byron Henderson, LDJ Editor
The LDSIG Board of Directors and I have been talking
for many years about how to incentivize LDSIG members to
contribute ideas and learning from their design, construction,
and layout visit experiences. We recognize that today’s world
offers more ways to share your thoughts besides formally in
a publication like the LDJ. Not to mention that everyone
seems to be busier than ever.
I have suggested that we reward LDSIG authors with an
extension of their membership for each article that they submit.
While the Board has never been opposed to the idea,
we’ve also never firmly moved forward. But the recent decision
by the Operations SIG to do just that has encouraged us
to get started with this program.
3, 2, 1 – Go!
Our goal is to encourage (and reward) contributions of
all types and scopes – small to major. So in recognition of
the difference in work involved, we decided on a scale of
membership extensions depending on the amount of material
contributed.
Any contribution of LDJ content will receive at least a
one-issue extension of the author’s current remaining issues.
As little as a single interesting and informative photo – with
a caption! – will qualify. For those with more to say and
illustrate, a contribution that results in three to five pages in
a published LDJ will be rewarded with a two-issue extension.
And for six pages or more, a three-issue extension! This
program begins with this issue.
Exceptions
Since our focus is on generating informative and interesting
content, items like news, election notices, event announcements,
LDSIG business reports, letters-to-the-editor,
reprints of articles from other sources, etc. will not qualify.
And the LDJ Editor retains the decision of what is appropriate
for publication in the Journal (though we accept and appreciate
almost everything!).
But what would I write?
All content ideas are welcome – whether something
you’ve done or something you’ve seen and documented.
Any of our Design Challenges may prove to be an inspiration.
And we’re already getting great response on the Ten-
Turnout-or-Fewer Challenge that was described in LDJ-69
and LDJ-70, including articles in this issue starting on pages
21 and 24. More Ten-Turnout articles are very welcome.
Double? Or half?
Another feature that we would like to encourage is the
“Double? Or Half” concept introduced in LDJ-63, First
Quarter 2019. This exercise asks the question: “What would
you do with your layout if you had only half the space? How
about double?” I think that this is a great thought experiment
and hope to share articles from other successful layout
builders considering the same question. With the same scale,
theme, era, and locale, what would you build in those different
spaces?
Operator (me) standing by
Please reach out to me with your article ideas and questions
(contact info page 2). We’d love to feature your ideas
in the LDJ – and to show our appreciation with free future issues.
(Of course, we also continue to welcome contributions
from non-LDSIG members. As in the past, they will receive
a complimentary printed copy of the LDJ in which their article
appears.) Our readers want to learn from you!
brewery
bottling and
shipping
e
Liquid
Carbonic
Californian coal & oi
freight house
team track
eet yard
shipping
ckets
ce
Kentucky
Lubricants 69 lumber
Chicago
Junction
Rwy Freight
house
Standard
Brands
Monogram
Models
Crayola
Western
screw
Metal
Coating
LDJ
38 Layout Design Journal www.ldsig.org
Like many other SIGs and hobby organizations, the
Layout Design SIG Board of Directors has chosen to use
electronic voting for elections of Directors going forward to
make it easier and faster for members to vote. This worked
well in our previous election (see results below). The current
election for a single seat with a 2023 through 2025 term will
again be conducted electronically via the widely used and
secure Election Buddy software.
The electronic ballot will be emailed directly to all
Layout Design Special Interest Group Members with a valid
email by March 17, 2023. To ensure that you receive the
ballot in a timely manner, please update your email address
with LDSIG Membership Chair John Young at:
cdjhyoung@yahoo.com
LDSIG Board of Directors Election
The current election is for one seat with a term through 2025. LDSIG members in good standing wishing
to be candidates in a future election may contact any board member (page 2) for more information.
No email? No problem.
If you are not able to receive email, you may still vote
by surface mail. Paper ballots will be automatically mailed
directly to LDSIG members without an email address on
file. The election for both on-line and postal mail voting will
close on April 28, 2023.
If you have not received a ballot by the end of March,
2023, or if you have any questions or concerns related to
the election, please contact Election Chair Ron Burkhardt
(page 2). Additional Election Committee members are Bill
Neale and Jay Qualman.
For reference, a Candidate Statement is found on page
39 and will also be included with the emailed ballot.
– Ron Burkhardt, Board of Directors Election Chair
Board of Directors Election Committee Report
The elections committee for the 2021 election was composed
of one member of the Board of Directors, Cal Sexsmith,
and two non-Board members, Greg Kujawa and Brian
Stokes.
The announcement of the Election and ballots were published
in LDJ-70, Third Quarter, 2021. The deadline for return
of ballots was set as November 30, 2021.
The elections committee verified membership for 189
ballots, nearly all submitted on-line. This was sufficient for a
quorum. There were no ballots with write-in candidates. The
Election results are as follows:
Chris Mesa – Elected
K. Travers Stavac – Elected
Several ballots contained updates or changes of contact
information, home and cell phone numbers, and/or layout
URL’s. They have been forwarded to our Membership Services
Chair, John Young, for updating our records. Thank
you for providing current information.
Members should contact John Young with any changes
or additions to their contact information and layout design
and/or layout interests (contact information page 2). See the
membership renewal form on the LDSIG website, which indicates
some of the areas that can help us make networking
more effective among members.
If you are interested in volunteering to become a candidate
in the next Board Member election, see below and
please contact Travers Stavac (page 2).
Thank you to the members of the Elections Committee
and to members for promptly returning their ballots.
– Respectfully submitted 11 January 2023
Cal Sexsmith; Board Member and Election Chair
Call for LDSIG Board of Directors Candidates for 2024-26 Terms
Two LDSIG Board of Directors seats will be up for election
later in 2023 for terms beginning in 2024. [Incumbent(s)
may also be running in this election.] Board seats are threeyear
terms and are open to any LDSIG member. According
to our bylaws, Directors are elected by SIG members and
LDSIG Officers are elected by the Board. (Except for the
President, officers need not be Board Members, although
they usually are).
Board Members meet periodically, normally by Internet
conference. It is helpful, but not required, that Board Members
also attend most NMRA National Conventions. Email
access is required to facilitate Board Member interaction.
Besides SIG membership, the main qualification is that
you are willing to work hard for the members of the LDSIG!
We encourage SIG members to run later in 2023 or in the
future. Please also vote in the current election, see top of
this page.
To become a candidate or for more information, contact
Travers Stavac (contact info page 2).
LDJ-71 First Quarter 2023 39
LDSIG Board of Directors Election
Candidate Statement: Cal Sexsmith
I was appointed to
the LDSIG Board in
the winter of 2013 to
fill a vacancy and was
elected to a three-year
term later that year
and re-elected in 2016
and 2019. I am now
letting my name stand
for election to a fourth
three-year term. During
my time on the Board I
spent one year as Vice-President and five years as Recording
Secretary. Since my election to the Board I have attended
several NMRA Conventions and helped with organizing
the LDSIG activities at those conventions. I was the Board
sponsor for the 2019 NMRA Convention in Salt Lake City
assisting our Local Activities Convention Coordinator in
setting up the convention activities. I have also been active
in promoting the LDSIG in the Sixth Division PNR, my
local NMRA Division.
I have been around model railroading my entire life and
have considered myself a model railroader since age 10. I
joined the NMRA in 1977 and the LDSIG in 1982. I have
volunteered for several model railroad organizations including
sitting on the Pacific Northwest Region Board; chairing
the 1995 PNR convention and several divisional meets; editing
the HIGHBALL, which is the Sixth Division newsletter;
and organizing local Operations SIG activities. I have also
been involved in railway heritage by volunteering with the
Saskatchewan Railway Museum and sitting on the Board of
the Museum and on the Board of the Canadian Council for
Railway Heritage, which recently merged with the Heritage
Rail Alliance. Following a recent move I have begun construction
of the most-recent version of the Parkland Division
in a purpose-built addition to our home. The Parkland Division
is based on the Canadian National and Canadian Pacific
joint lines on the northern prairies of western Canada trying
to replicate the railways I remember from the 1960s and 70s
in my hometown of Prince Albert, Saskatchewan. Through
my association with the LDSIG I have learned the value of
researching the prototype to make the model railroad appear
more believable.
I retired from a 34-year career as a Civil Engineer with
the City of Saskatoon in 2016, mostly in the water & sewer
and land development areas along with a bit of time in
transportation planning and asset management. Since then I
have been working on an as-needed basis with a local consulting
firm. I have been involved as a volunteer with the
Association of Professional Engineers and Geoscientists of
Saskatchewan, the American Water Works Association, and
the Canadian Society for Civil Engineering.
Moving forward, I am supportive of the efforts to rebuild
the LDSIG’s internet presence and working on means
to recruit and retain members by enhancing services. Those
of us who are fortunate enough to attend NMRA National
Conventions on a regular basis have been well-served by the
LDSIG activities at the conventions. However, we need to
expand our reach into more Regional activities by providing
support to the organizers of more local events. From my
volunteer efforts with other organizations I believe that you
only get out of an organization what you put into it. If I am
successful in being elected to the LDSIG Board I will continue
with the successes of the previous Boards and work
towards expanding our services to the membership and the
hobby as a whole.
– Cal Sexsmith
Rich Blake photo
I’m pleased to share a couple more stories from our Ten-
Turnout Design Challenge, with a number more in the hopper.
It’s fun to see what folks are coming up with. And we
will have room for more, so take a look at LDJ-69 or LDJ-70
for instructions, or contact me (page 2).
Write articles, get future issues – free!
And speaking of articles, how about we reward you for
yours? See page 37 for more on our new program that lets
you earn future LDJ issues added to the end of your subscription
for every article you submit. Depending on the
amount of content, we’re rewarding you with one, two, or
three future issues. As simple as a photo with meaningful
caption or as long as a detailed description of your concept
and design – now you’ll receive more than just my sincere
thanks for sharing with your fellow LDSIG members.
What’s next?
Authors have continued graciously sharing material
while I was on forced hiatus. So we have plenty to bring to
you in at least two more issues this calendar year. And when
I find out where the movers left my train stuff, maybe some
construction will happen around here eventually.
As always, thanks to the authors and volunteers who
make each issue possible.
Editor’s message …
(continued from page 3)
LDJ
If the “Issues remaining” above your address reads
“Last Issue” or “1”, please renew immediately (see page 2).
Layout Design Special Interest Group, Inc.
LDSIG Member Support
505 Oakwood Avenue
East Aurora, NY 14052
Address Service Requested
One or Two Tracks?
(story begins on page 32)
The nominally double-track from Rising Wolf to the Shelby
Staging Yard uses one track for ascent up the grade and the
other for descent in the other direction. There is, however, a
passenger station in this area that requires passenger trains to
use a specific track whether ascending or descending the grade.
As such, freight trains must be aware of their positions at all
times to know whether they need to change tracks.
So, whether we are designing a layout for multiple operators
or to be a lone wolf, consider from the start if the operation
of the layout will be the primary concern. A loop or
dog-bone option where a train can run continuously may be
a good addition for break-in and display, but I wouldn’t suggest
making it the goal of the layout. Instead, I suggest adding
operator complexity.
Single-track may often be the most intense, but may also
require engineers to just wait on a passing siding for long periods
and increase dispatching workload too much. Some double-
track mainline arrangements may not create enough interaction.
My suggestion is to combine the best of both worlds to
obtain maximum interest.
Lastly, five people joined the NMRA because of participation
in the operation of the Glacier Line layout! Encouraging
people to become model railroaders, joining the NMRA,
and then helping others should always be something we strive
for – whatever the layout concept and interest.
(Above) Double-track mainline is seen on the left through
Cataract, but converges to a single track through the tunnel
at the rear, before entering the directional double-track
through Rising Wolf on the way to staging.
The double-track through Cataract continues to Camp
Disappointment before converging again for the Goat Lick
Bridge, as seen at right.
LDJ
